If you’ve ever admired a kitchen where the countertops seem to flow right into the range, creating one clean, unbroken line, you’ve seen a slide-in range in action. These appliances are designed to fit snugly between your cabinets, with the cooktop slightly overlapping the counter for a high-end, custom look.
What Makes a Slide-In Range a Popular Choice
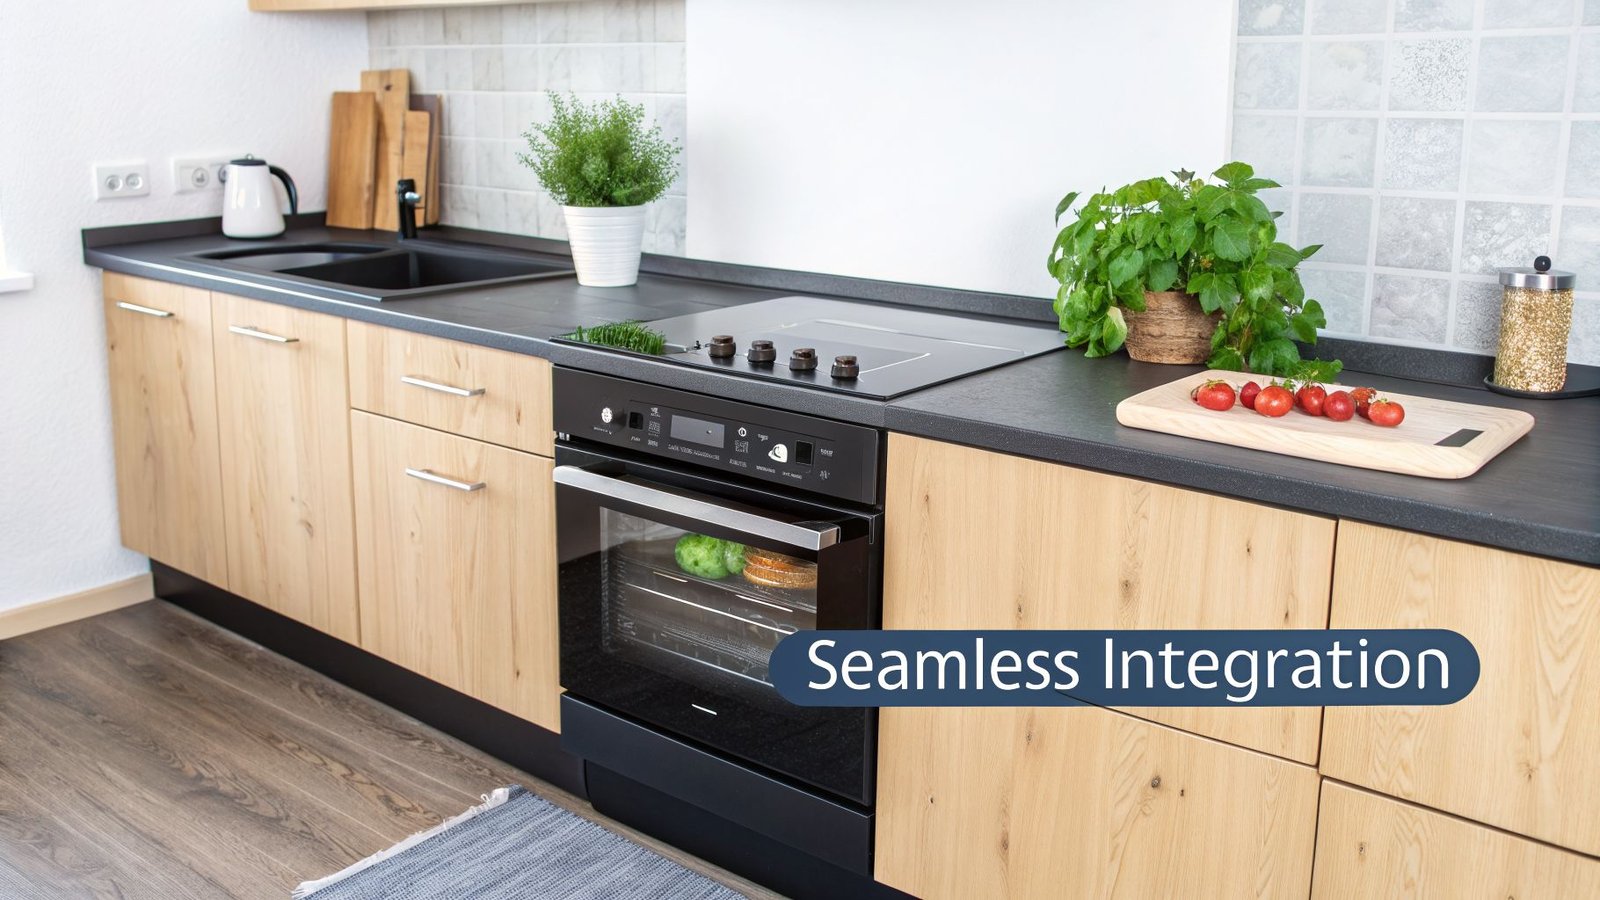
A slide-in range offers a premium, integrated look without the major cabinet modifications and expense that separate built-in cooktops and wall ovens require. Unlike a freestanding range, which has finished sides and a backguard with controls, a slide-in is built to blend in with your cabinetry.
Key Features Defining the Slide-In Design
The seamless appearance of a slide-in range comes from a few key features that create the smooth, continuous lines popular in modern kitchens.
- Front-Facing Controls: All knobs and digital displays are on the front of the appliance, not on a backguard. This allows your backsplash to run uninterrupted behind the cooktop for a clean look.
- No Backguard: The absence of a built-in backguard is what creates the "slide-in" effect, making the range appear as a natural part of your counter space.
- Overlapping Cooktop: The edges of the cooktop have a small lip that rests just over the countertop on each side. This closes the gap, stopping crumbs and spills from falling into the hard-to-clean crack between the appliance and the cabinet.
This integrated style has made the slide-in range a go-to for kitchen renovations.
The Practical Benefits of a Slide-In Range
Beyond its appearance, a slide-in range has practical advantages. The front-control layout means you aren’t reaching over hot pots and pans to adjust the temperature, which is a significant safety benefit.
The core benefit is achieving a custom, high-end kitchen aesthetic without the cost and complexity of a full cooktop and wall oven installation. It's a powerful design choice that merges form and function.
Cleaning is also easier. The overlapping cooktop creates a tight seal against the counter, and with no bulky backguard, wiping down the surface and the wall behind it is simple. Of course, choosing the right fuel type is just as important. Our guide on making your ideal cooktop choice can help you decide between induction, gas, or electric to match your cooking style.
Choosing the Right Range for Your Kitchen
Deciding between a slide-in range and a traditional freestanding model comes down to your kitchen’s layout, design goals, and budget. While both appliances cook food effectively, they have different impacts on the look and feel of your space.
A slide-in range is all about achieving a clean, custom-built look. It’s designed to fit between two base cabinets, creating a seamless, integrated feel. In contrast, a freestanding range is a self-contained unit with finished sides, so it can be placed anywhere—at the end of a cabinet run or even on its own.
Comparing Slide-In vs Freestanding Ranges
The most obvious visual difference is the backguard. Freestanding ranges have a tall, built-in panel at the back where the controls are usually located. A slide-in range has no backguard, and its controls are on the front. This lets your backsplash run uninterrupted, creating a sleek, continuous feature wall.
Another detail is the cooktop edge. Slide-in models have a small lip or flange that slightly overlaps the countertop. This design covers the gap between the appliance and the counter, stopping crumbs and spills.
To clarify the options, let’s compare the main differences between a slide-in, a freestanding, and a full built-in setup.
Range Type Comparison Guide
This table breaks down the key differences between slide-in, freestanding, and built-in ranges to help you choose the right appliance for your kitchen.
| Feature | Slide-In Range | Freestanding Range | Built-In (Cooktop & Wall Oven) |
|---|---|---|---|
| Appearance | Built-in, seamless look. | Standalone appliance, finished on all sides. | Fully integrated, maximum design flexibility. |
| Installation | Sits between cabinets; needs a precise cutout. | Can be placed anywhere; forgiving placement. | Requires custom cabinetry and separate cutouts. |
| Controls | On the front panel, below the cooktop. | Typically on the rear backguard. | On the cooktop surface and the wall oven face. |
| Sides | Usually unfinished, meant to be hidden. | Always finished for flexible placement. | N/A (integrated into cabinetry). |
| Backsplash | Allows for an uninterrupted backsplash. | The built-in backguard interrupts the design. | Fully customizable backsplash. |
Thinking about a new slide-in range means considering your kitchen as a whole. A good resource on how to choose the right appliances for your kitchen renovation can help ensure your new range fits with your other choices.
What About Built-In Cooktops and Wall Ovens?
For the ultimate high-end, integrated kitchen, there's a third option: a separate cooktop and wall oven. This "built-in" configuration offers the most design freedom but has its own trade-offs.
A built-in setup completely separates the cooking functions. You can install a gas cooktop on your kitchen island and place a double electric wall oven across the room, tailoring the layout perfectly to your cooking workflow.
This approach is the most complex and usually the most expensive. It requires significant cabinet modifications, dedicated electrical or gas lines for two separate appliances, and a larger initial investment.
A slide-in range is a fantastic middle ground. It provides a similar high-end, integrated look for a fraction of the cost and hassle of a full built-in combination. It effectively mimics that custom style while being a single, all-in-one appliance.
Ultimately, the right choice depends on your priorities. If you value placement flexibility and a wider range of price points, a freestanding range is a solid choice. But if your goal is a modern, seamless kitchen aesthetic without a major renovation, the slide-in range is the perfect solution.
Your Guide to a Flawless Slide-In Range Installation
Correctly installing a slide-in range is all about precision. Unlike a freestanding model, a slide-in demands careful planning to achieve its clean, built-in look. Getting the details right ensures your new range will not only work perfectly but also blend seamlessly with your counters and cabinets.
Preparation starts long before delivery. You need to take meticulous measurements, check utility locations, and understand safety clearances. This prep work is what separates a frustrating installation from a smooth, professional-looking result.
Preparing Your Space for a Perfect Fit
Installing a slide-in range is like fitting a crucial puzzle piece into your kitchen. If the opening isn't just right, the entire look can be compromised. You must measure the width, depth, and height of your cabinet cutout with complete accuracy.
- Width: Measure the gap between your cabinets at the front, middle, and back. Use the smallest of the three measurements to ensure the range will slide in without scratching your cabinet faces.
- Depth: Measure from the back wall to the front edge of your cabinets. Slide-in ranges are often not as deep as freestanding ones, so you might need a small filler strip of countertop material behind it to close any gap.
- Height: Measure from the floor to the top surface of your countertops. The top of your range should sit level with, or just slightly above, your counters so the overlapping edges have a place to rest.
Being off by even a small amount can ruin the seamless look and create gaps that attract crumbs and spills.
The image below shows the key differences between slide-in, freestanding, and built-in ranges, helping you visualize how each one affects your kitchen's final look.

The design of a slide-in range offers a custom, integrated look that's a step up from a standalone freestanding unit, without the full commitment of a separate wall oven and cooktop.
The Essential Pre-Installation Checklist
Once your measurements are confirmed, it's time to check your utilities and safety clearances. These are critical for both function and safety.
Before you get started, it's a good idea to review a home electrical inspection checklist. This will help you confirm your kitchen's wiring can safely handle the new appliance.
Your electrical outlet or gas line must be in the exact spot specified in the manufacturer's installation manual. A misplaced utility hookup is a common and frustrating roadblock. Also, double-check that your countertops are level. If they aren't, the range's overlapping flange will sit unevenly.
Finally, confirm you have the required clearances. Your slide-in range needs space to vent heat safely. The manual will specify the minimum distance needed between the range and any combustible materials, like your upper cabinets. Ignoring these clearances is a serious fire hazard.
DIY Installation vs. Calling a Professional
Many handy homeowners can install a basic electric slide-in range, which often just involves levelling the unit and plugging it in. If you're confident with a tape measure and have a straightforward setup, a DIY installation is possible.
However, some situations absolutely require a professional. If your installation involves any of the following, your safest bet is to call an expert:
- Gas Line Connection: Working with gas lines is not a DIY job. A small, undetected leak can have catastrophic consequences. Certified technicians have the proper tools and training to ensure a safe, leak-free connection.
- Complex Electrical Work: If your new range requires a different type of outlet or your home’s wiring is outdated, you need a licensed electrician or a qualified appliance installer to do the work safely.
- Countertop or Cabinet Modifications: If the cutout opening is the wrong size, a professional can make the necessary adjustments to your counters or cabinetry for a perfect fit without causing expensive damage.
For a job this important, trusting a professional is often the smartest move. If you need assistance, you can learn more about our expert appliance installation services to get peace of mind that your new appliance is set up correctly and safely.
Troubleshooting Common Slide In Range Issues
Even the best slide-in range can experience problems. The good news is that many common issues have simple, safe fixes you can handle yourself. Knowing what to look for can help you identify a quick DIY repair or determine when it’s time to call a professional.
Before you begin any troubleshooting, prioritize safety. Safety first, always. For an electric range, go to your circuit breaker and shut off the power. For a gas range, find the shut-off valve—usually located behind the appliance—and turn the gas supply off completely.
Oven Not Heating or Not Reaching Temperature
One of the most frustrating problems is an oven that won't heat up or hold its temperature. The cause is often simpler than you might think.
Start with the basics. For an electric slide-in, is it plugged in all the way? Check your home’s breaker panel to ensure it hasn't tripped. For a gas model, confirm the gas supply is on and that other gas appliances in your home are working. It's also worth checking your manual to see if a special mode like "Sabbath Mode" or "Demo Mode" has been accidentally activated, as these can disable heating functions.
If these simple checks don't resolve the issue, a part may have failed:
- Failed Igniter (Gas Ovens): This part must glow bright orange or white to get hot enough to open the gas valve. If it’s weak or broken, the gas won't flow, and the oven will stay cold.
- Burnt-Out Bake Element (Electric Ovens): This is the element at the bottom of your oven. A visual check may reveal obvious blisters, cracks, or a break in the metal.
- Faulty Temperature Sensor: This small probe, typically found in a back corner of the oven, can fail and send incorrect temperature readings to the main control board, causing the oven to be too hot or not hot enough.
While you can often see if these parts are damaged, replacing them usually requires disassembling the range. If you suspect one of these is the issue, it is best to call a professional. You can learn more in our guide on the top 5 range and stove problems and how to fix them.
Gas Burners That Won't Light
When a gas burner fails to light, the problem is almost always related to the spark or gas flow. Often, the cause is simply a dirty burner. Caked-on food and grease can clog the small ports on the burner head or cover the igniter.
Safety First: Before cleaning, ensure all burner controls are in the "Off" position and the cooktop is completely cool. Never use flammable cleaners near gas components.
Gently lift off the grates and burner caps. Use a small brush or a straightened paperclip to carefully clear any debris from the burner ports and around the igniter. Wipe everything down with a damp cloth and mild soap, then dry all components thoroughly before reassembling. A damp igniter will not spark.
If a thorough cleaning doesn't work, you could be dealing with a loose wire connection to the ignition module or a failed spark electrode. These are internal repairs that involve wiring and should be handled by a certified technician.
Unresponsive Control Panel or Error Codes
A blank or unresponsive control panel can be frustrating, effectively locking you out of your oven. The first step is to try a simple reset. Turn off the power at the circuit breaker for 5-10 minutes, then switch it back on. This can often clear up minor electronic glitches.
If your panel is working but flashing an error code (like F1, F3, or F9), the range is indicating what it thinks is wrong. Your user manual will have a chart explaining each code. While some codes point to simple fixes, many indicate a failure in a major part like the oven sensor or the main electronic control board.
Persistent error codes, or a control board that remains unresponsive after a power cycle, points to a deeper electrical problem that requires professional diagnostics and repair.
Simple Maintenance for Long-Term Performance
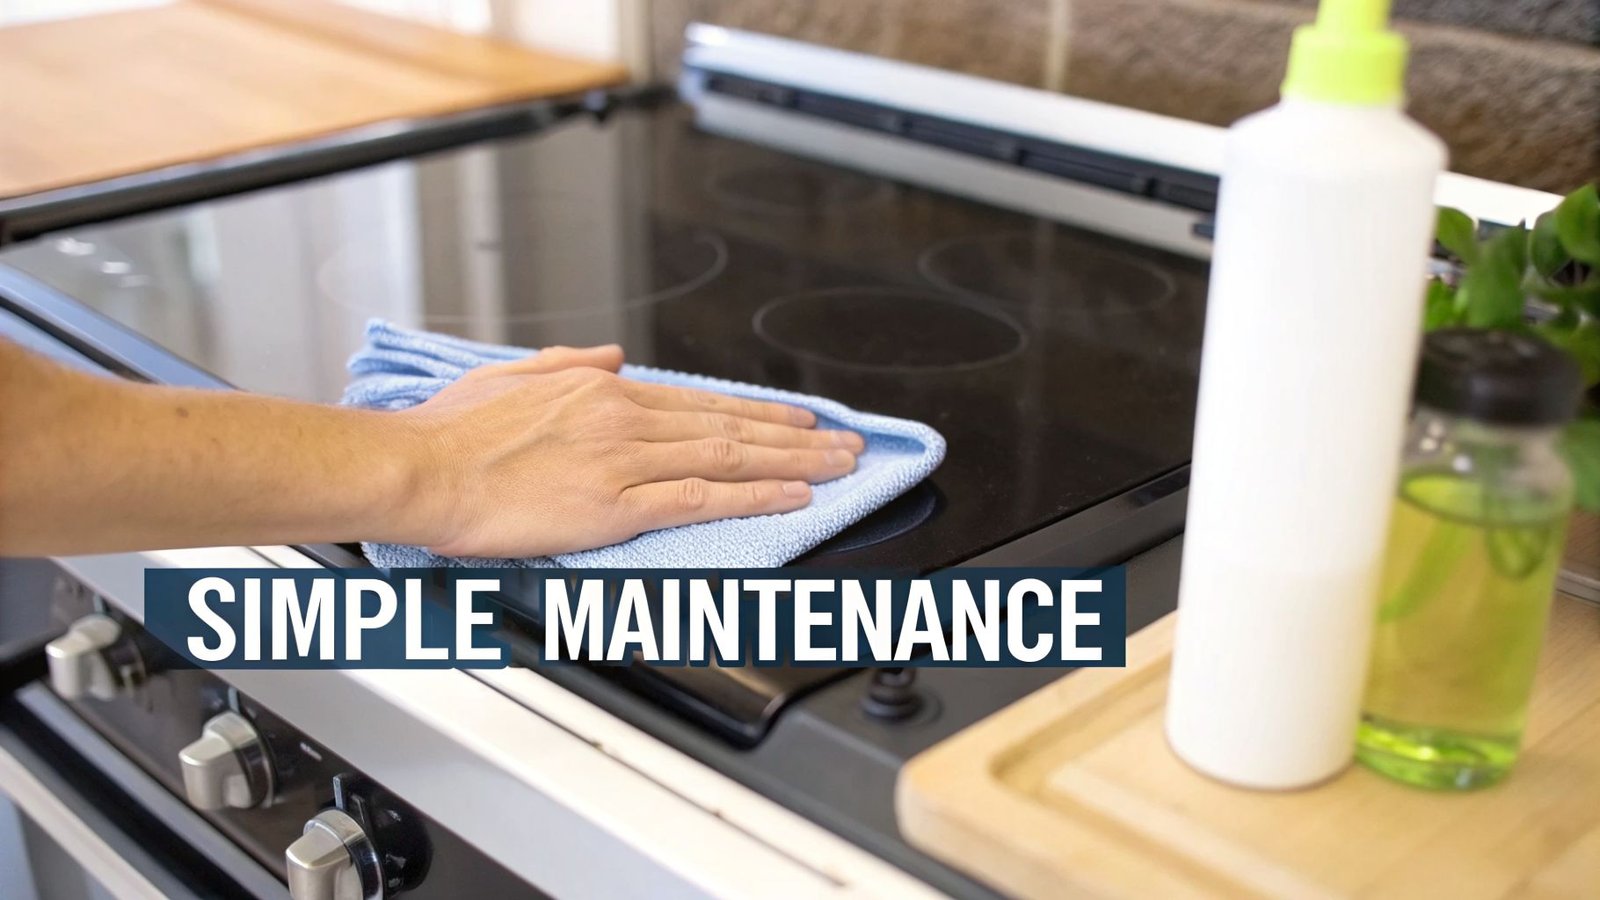
Keeping your slide-in range in top condition doesn’t require hours of work; it's about consistency. A little care goes a long way in protecting your investment, ensuring it cooks reliably for years, and helping you avoid emergency repair calls.
Small, preventative habits make all the difference. Regular upkeep not only keeps your range looking new but also maintains its efficiency and safety, preventing minor issues from becoming major problems.
Caring for Your Cooktop
The cooktop sees the most daily action, and how you clean it depends on the surface type. Using the wrong cleaner or scrub pad can cause permanent scratches or discoloration.
- Glass and Ceramic Cooktops: Always wait for these surfaces to cool completely. Use a soft cloth and a cleaner made specifically for glass cooktops. For stubborn, burnt-on messes, a plastic scraper or a dedicated cooktop razor held at a flat angle can lift debris without scratching the glass.
- Gas Burner Grates and Caps: If you have cast iron grates, do not use harsh abrasives or put them in the dishwasher, as this will damage the finish. The best method is a soak in hot, soapy water, followed by a gentle scrub with a non-abrasive brush. Ensure every piece is 100% dry before you put it back to prevent rust and ensure a proper flame.
A clean cooktop promotes even heat distribution and, on gas models, is crucial for a steady, safe flame.
Using the Self-Clean Feature Wisely
The self-clean cycle is a useful feature, but it puts your oven through extreme stress with high heat. Using it correctly is key to getting a clean oven without causing damage.
The self-clean feature works by locking the oven door and superheating the inside to temperatures often over 480°C (900°F). This incinerates all the baked-on grime and food spills into a fine ash you can simply wipe away.
Before starting, remove all oven racks, pans, and any stray aluminum foil—the intense heat can warp them or fuse the foil to the oven's interior. It also helps to wipe out any large, greasy spills first. Most importantly, ensure good ventilation by opening a window, as the process can create some fumes.
We recommend using this feature sparingly, perhaps a few times a year. Running it too often can shorten the lifespan of sensitive electronic components and heating elements that are not designed for constant high-heat exposure.
Checking the Oven Door Gasket
The rubber or woven gasket lining your oven door is very important. It creates an airtight seal, trapping heat inside so your oven can hold a precise, consistent temperature for proper baking and roasting.
Every so often, give it a quick inspection. Look for any signs of wear:
- Cracks or splits in the material
- Fraying or unravelling sections
- Spots that look brittle, compressed flat, or feel hard
- Noticeable gaps that would let heat escape
A worn-out gasket means your oven has to work harder, leading to longer preheat times, unevenly cooked food, and a higher energy bill. If you spot any damage, it is a simple and affordable part to have replaced that makes a world of difference in performance. For more advice, see our expert tips on oven maintenance and repair.
Knowing When to Call an Appliance Professional
While some troubleshooting can solve common slide-in range issues, your safety must come first. Knowing when to put down the tools and call a certified technician is the smartest and safest choice, especially when dealing with complex gas or electrical systems.
Some problems are clear indicators that you need immediate professional help. Attempting to fix these yourself is not only dangerous but could also cause more damage to your range or void its warranty.
Clear Red Flags for a Professional Call
If you notice any of these signs, stop what you’re doing immediately and call a qualified appliance technician. These symptoms point to serious internal failures that require specialized tools and expert knowledge to fix safely.
- The Smell of Gas: This is the most critical warning. If you smell gas near your range, do not try to find the leak. Turn off the gas supply valve right away, open your windows to ventilate the room, and call for emergency service.
- Visible Sparks or Arcing: Seeing sparks from the control panel, the outlet, or anywhere on your range indicates a dangerous electrical fault. Unplug the unit or shut off its circuit breaker immediately.
- Recurring Error Codes: An error code that returns even after a power reset is a sign of a chronic hardware failure. It's often a faulty sensor or a failing electronic control board that needs an expert to diagnose.
- Complete Failure to Power On: If your range is completely dead and you have already checked the circuit breaker, the problem is internal. It could be anything from a fried control board to a faulty power supply or wiring issue.
Why Some Repairs Are Not DIY Jobs
Modern appliances are complex machines. A slide-in range, particularly a newer model, is packed with sophisticated electronic control boards, sensitive sensors, and intricate wiring. Fixing these components requires more than a screwdriver and a can-do attitude.
Attempting to repair gas lines or complex electrical components without proper training is a significant safety risk. Certified technicians have the diagnostic equipment to pinpoint faults accurately and the expertise to ensure repairs meet all safety standards.
For example, replacing a gas valve or an electronic control board requires a deep understanding of the entire system. One wrong connection could trigger a gas leak or a catastrophic electrical short. To ensure your range is handled correctly, it's crucial to understand when to call an appliance repair technician. For anything more complex than basic cleaning and simple resets, trusting a professional is the only way to protect your appliance and your home.
Frequently Asked Questions About Slide In Ranges
Have a few questions about a slide in range? Here are some straightforward answers to common queries to help you make the right choice for your kitchen.
Can I Replace a Freeststanding Range with a Slide In Model?
Yes, you can swap a freestanding range for a slide-in, but you will almost always need a minor countertop modification. A slide in range is not as deep as a freestanding one and sits flush with your cabinetry, which often leaves a gap between the back of the appliance and the wall.
This is a common and easy fix. A countertop professional can install a small filler strip of matching material behind the range. This closes the gap, provides a seamless, built-in look, and prevents food or utensils from falling behind the unit.
Do All Slide In Ranges Have Unfinished Sides?
Traditionally, yes. The original slide in range was designed to be installed between two cabinet runs. Since the sides were not meant to be seen, manufacturers often did not finish them.
However, manufacturers have adapted to modern kitchen layouts. Many newer slide-in models now feature finished sides, so you can install one at the end of a cabinet run without it looking out of place. Always check the product specifications before you buy.
Why Are the Controls on the Front of a Slide In Range?
Moving the controls to the front is a core part of the slide-in design. By placing the knobs and display on the front panel, the tall backguard found on freestanding ranges is eliminated.
This design is what allows for a clean, uninterrupted backsplash and gives the appliance its sleek, custom-built look. It’s a key reason they are popular in modern kitchen designs. As a bonus, it is also safer—you no longer have to reach over hot pots and pans to adjust the heat.
If your slide-in range needs professional attention or you're planning a new installation, trust the certified experts at Advance Appliance Ltd. We offer same-day and next-day service across Edmonton, Calgary, and Red Deer. Book your service online today!