
Testing Oven Temperature
Preparation for Professional Technicians
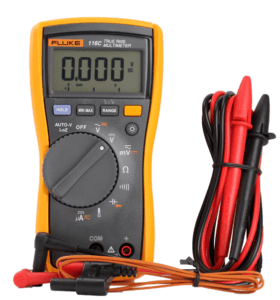
Tools Required:- Digital Multimeter with temperature measurement function.
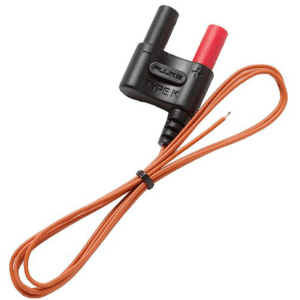
- Thermocouple compatible with the multimeter (example: Type-K thermocouple with standard shrouded banana jack).
How to Test Your Oven Temperature with a Thermocouple
Place one rack at the center of the oven, and put your thermocouple at the center of the rack, making sure the probe is not touching any metal.
- Preheat: Preheat the oven to 350 °F. Important: Do not open the oven door until all readings are complete.
- Record first cut in / cut out: After preheat, write the first CUT IN and CUT OUT.
- Start timed recording: After 20 minutes, begin recording temperature cycles.
- Normal swing range: Typically around 330°F–370°F. Do not open the door.
- Repeat cycles: Capture additional CUT IN and CUT OUT readings.
- Collect 10 total readings (5 cycles).
- Sum the readings: Add all CUT IN + CUT OUT results.
- Review sample data: See Fig. 1 below.
- Calculate average: Divide the total by 10.
- Example: 3539 ÷ 10 = 353.9 °F.
Sample Data: Fig. 1
| CYCLE # | CUT IN | CUT OUT |
|---|---|---|
| 1 | 326 °F | 380 °F |
| 2 | 331 °F | 374 °F |
| 3 | 334 °F | 375 °F |
| 4 | 341 °F | 369 °F |
| 5 | 339 °F | 370 °F |
General Information
- The point where the element turns **on** is the CUT IN temperature.
- The point where it turns **off** is the CUT OUT temperature.
- Electric ovens commonly overshoot temperature even after the element is off.
- Most ranges have an indicator light showing ON/OFF cycling.
If your oven will not stabilize or the average is far from the set point, schedule a professional diagnosis with Advance Appliance Ltd.

Oven Temperature Calibration (General Information)
Most newer ovens equipped with an electronic control unit can be calibrated to adjust temperature accuracy. Always refer to the official Use & Care Manual for your appliance before performing any calibration.
General Procedure: Oven Temperature Calibration
The steps shown below are only an example taken from a Whirlpool brand oven. These instructions cannot be used as a universal guide for other appliance brands. Always follow the calibration procedure written in your appliance’s manual.
Sample Calibration Steps (Whirlpool Model: WOS51EC7AS)
- Plug in the oven or reconnect power to the appliance.
- Press SETTINGS until “TEMP CALIB” appears on the display.
- Press START. The current calibration offset (if any) will appear. The temperature adjustment range is from -30°F (-18°C) to +30°F (+18°C).
- Press the “1” keypad to increase the temperature in 5°F (3°C) increments.
- Press the “2” keypad to decrease the temperature in 5°F (3°C) increments.
- Press START to confirm and activate the new temperature offset.
If your oven continues to cook unevenly, overheats, or will not maintain temperature, schedule a professional diagnosis with Advance Appliance Ltd.
Common Issues or Complaints: Unstable Oven Temperature
A frequent complaint from homeowners is that the oven temperature seems to fluctuate and is not stable. In reality, modern ovens cycle ON and OFF (CUT IN and CUT OUT) as part of normal operation, but there are also conditions that can cause true temperature problems.
Below are some possible reasons why oven temperature may appear or become unstable:
- 1. Settings were cancelled or changed mid-cycle
The user may have cancelled the original bake cycle and re-set the oven to a lower or higher temperature. When this happens, the displayed temperature on the electronic control will often no longer match what was seen earlier in the cycle.
This is normal behavior: the oven’s internal logic is designed to average CUT IN and CUT OUT readings over time. By cancelling or changing the settings, the stored data is reset, and the control needs several minutes of operation to gather new thermocouple readings and rebuild a stable temperature average. - 2. Out-of-range or defective oven temperature sensor
Oven sensors are not the most common failure, but they can fail. The resistance value of the sensor must match the manufacturer’s temperature–resistance chart for the ambient temperature inside the oven. If the sensor is out of range, cracked, or shorted, the control will receive incorrect readings and can cause inconsistent oven temperatures. - 3. Failed thermal fuse (safety device)
If the oven exceeds its safe operating temperature, the thermal fuse may open. On most designs this fuse is non-resettable. A blown thermal fuse is a safety event and:- Must not be bypassed permanently.
- Requires inspection of related components such as the cooling fan, oven sensor, and control board relays.
- May indicate blocked vents, cooling issues, or stuck contacts in the relay board.
- 4. Faulty oven relay control board
The relay board may have contacts that are shorted, pitted, or partially closing. This can cause the element to energize at the wrong times or for too long, resulting in overshooting, slow response, or large swings in temperature. - 5. Faulty oven elements
Bake, broil, or hidden elements must be checked for proper resistance and to confirm they are not shorted to ground. An element that is open, partially shorted, or intermittently failing can cause uneven heating, hot spots, or poor recovery time.
If you’ve confirmed your readings and the oven still will not maintain a stable temperature, it may be time for professional diagnosis. You can book stove and oven repair with Advance Appliance Ltd for expert testing of the sensor, elements, relays, and safety devices.
Recommended Professional Testing Tools
For precision, accuracy, and trusted performance in appliance diagnostics, we recommend using professional-grade tools from Fluke. Fluke instruments are widely recognized in the industry for their reliability and safe operation in both residential and commercial environments.
- Fluke Digital Multimeter with temperature measurement capability
- Type-K Thermocouple or equivalent high-temperature probe
- CAT-rated test leads and accessories designed for appliance diagnostics
You may also use tools from other reputable brands as long as they meet the same professional grade, safety rating, and certification standards. All instruments should have a valid certificate of calibration to ensure measurement accuracy.
Official Fluke website (trusted and verified): https://www.fluke.com/
Oven Temperature Averaging Calculator
Enter up to 10 readings from your test (for example, 5 CUT IN and 5 CUT OUT values). The calculator will show the average in both °F and °C.
Tip: For the example in this guide, there are 10 readings (5 CUT IN + 5 CUT OUT). Leave any unused fields blank.
Acceptable oven temperature tolerance: In many residential ovens, an average temperature within about ±25 °F (±14 °C) of the set temperature is generally considered normal. Always refer to the manufacturer's specifications for the exact tolerance of your model.
Website Information Disclaimer
The information provided on the Advance Appliance Ltd. website is intended for general informational purposes only and should not be interpreted as professional advice. For all appliance repair needs, we strongly recommend consulting a qualified and licensed appliance repair technician.
While we make every effort to ensure the information on our website is accurate and up-to-date, we do not guarantee that all content is complete, current, or free of errors.
Therefore, Advance Appliance Ltd. disclaims any and all liability for damages or losses that may result from the use of information found on this website. This disclaimer applies only to content published on our site and does not extend to any external appliance repair resources or third-party information sources.