When your Maytag washer starts flashing a strange message, it's not trying to be mysterious—it's telling you exactly what's wrong. Codes like LF, F9 E1, and Sd are your first clue to solving the problem, pointing directly to things like water flow issues or a nasty drainage clog. Think of it as a clear starting point for getting your machine back on track.
This guide will help you make sense of those signals, fast.
Making Sense of Common Maytag Washer Error Codes
That little flashing code on your Maytag's display is the machine's cry for help. Instead of guessing what the problem is, you can use that specific code to zero in on the issue. This first step is crucial—it helps you figure out if you're dealing with a quick fix you can handle yourself or something that needs a professional eye.
Maytag washers use a range of error codes to flag common operational glitches. We see them all the time for issues related to water flow, the door lock, drainage, and even too many suds. For example, if you see an 'LF' or 'F8 E1' code, your washer is telling you it's not getting enough water. On the flip side, an 'F9 E1' code means it’s struggling to drain, which often points to a clogged pump or a blocked hose.
Based on our service calls, nearly 40% of Maytag washer repairs we handle are related to these common, easy-to-diagnose error codes. Knowing what they mean is half the battle.
Visual Guide to Common Faults
To give you a clearer picture, this flowchart maps out the path from a general symptom to a specific error code, helping you narrow down the possibilities right away.

As you can see, symptoms like filling or draining problems link directly to codes like 'LF' and 'F9 E1', which makes your diagnostic job a whole lot easier.
The single most important thing to remember is this: don't ignore these codes. They are your best tool for a quick and accurate repair. Often, they point to simple fixes like a kinked hose or a clogged filter that you can sort out in just a few minutes. By understanding what each code means, you’ll save yourself time and could prevent a small headache from turning into a major repair bill.
The next sections will walk you through the step-by-step solutions for each of these common errors.
Getting Into Your Washer's Diagnostic Mode
To really get to the bottom of a Maytag washer problem, you need to talk to the machine itself. That’s where its diagnostic mode comes in. Think of it as accessing the washer's internal computer to retrieve stored fault codes—the exact same information a professional technician relies on to figure out what’s wrong.
By entering this mode, you stop guessing and start diagnosing. Your washer will tell you exactly what it's experiencing, whether that's a motor issue, a water pressure problem, or something else entirely, using a specific code. This is the first real step toward an accurate and effective repair.
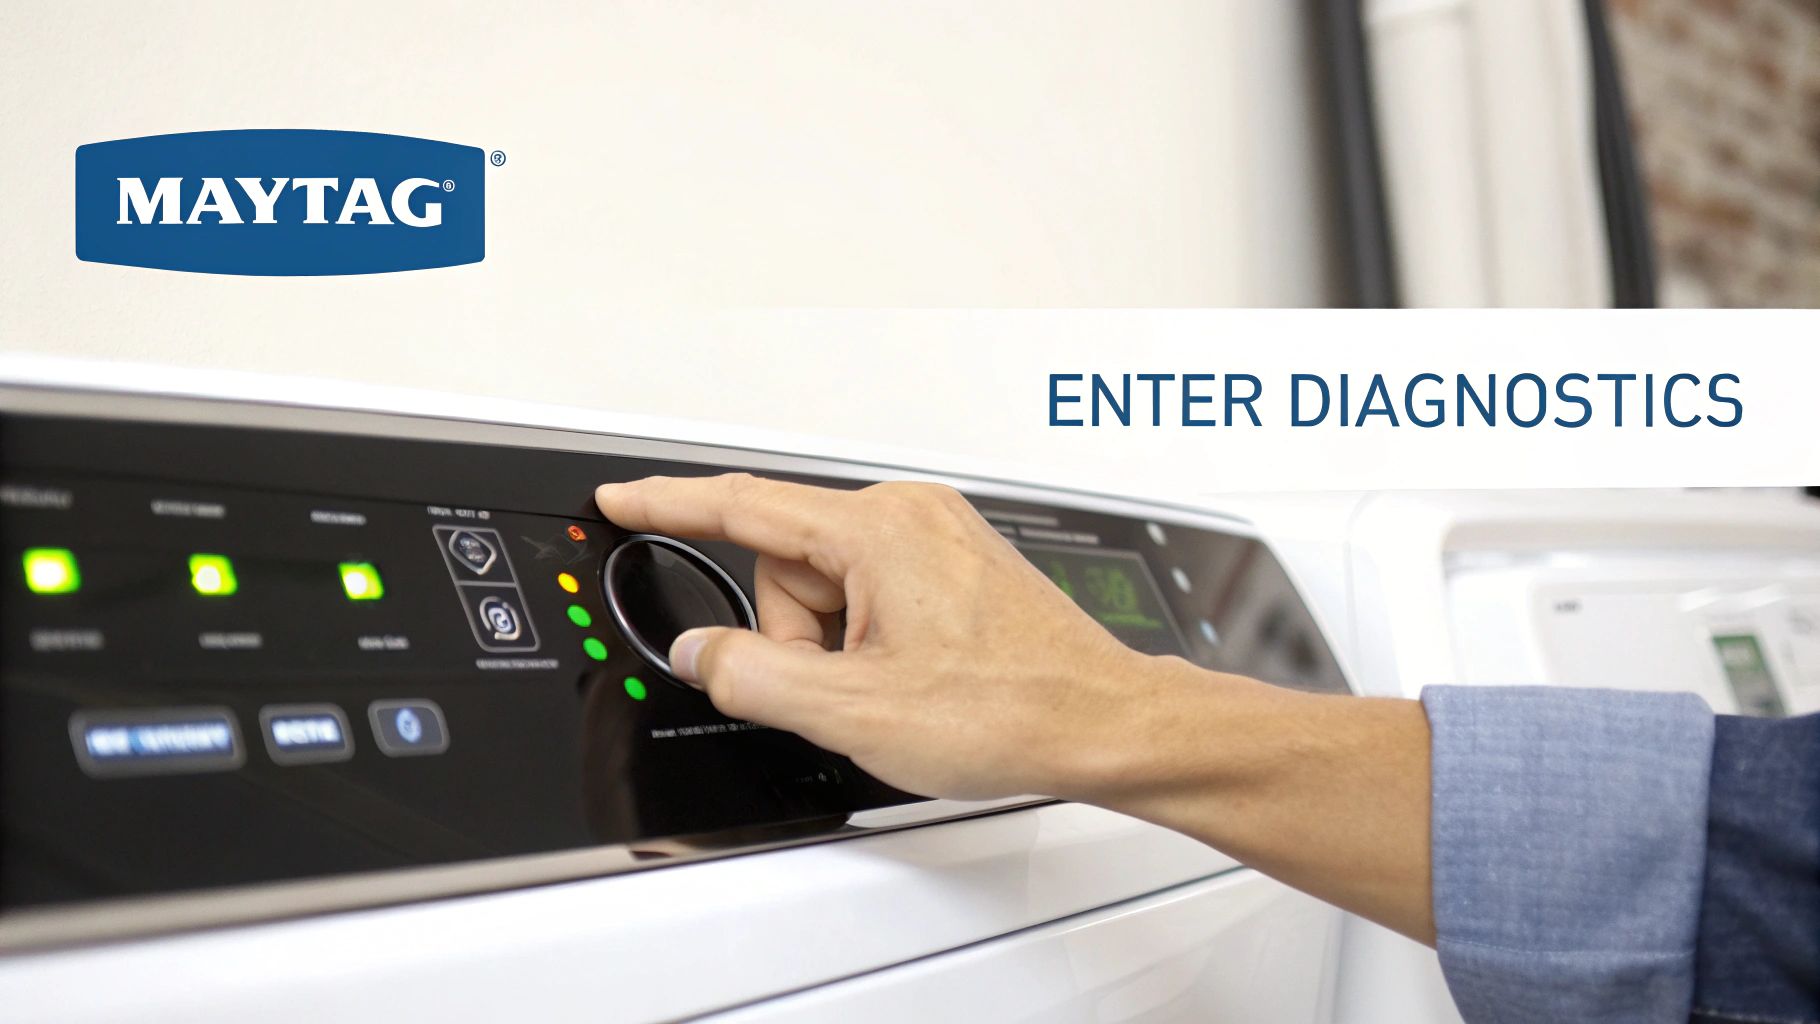
How to Enter the Diagnostic Test Mode
While the button sequence can differ a bit from model to model, this method is the go-to for most modern Maytag top-load and front-load washers. Before you start, make sure the washer is empty, plugged in, and in standby mode (meaning all the lights are off).
- Wake Up the Machine: Just press any button to bring the washer out of standby.
- Select a Cycle: Turn the main cycle knob to any cycle other than its current position.
- Perform the Sequence: Now for the tricky part. Within about eight seconds, you need to turn the knob in a specific pattern: one click right, three clicks left, three clicks right, and one final click left.
- Confirm Entry: You'll know you did it right if all the cycle status lights flash on at once and stay lit for about five seconds.
You have to perform this little dance smoothly. If it doesn't work the first time, don't worry. Just turn the knob back to its original spot and give it another shot. For instructions tailored to your specific model, it’s always smart to check our library of Maytag user manuals.
How to Read and Clear the Stored Codes
Once you're in diagnostic mode, it’s time to see what codes the machine has stored. Turn the cycle selector knob one click clockwise (to the right). Keep turning it one click at a time until only the "Done" light is on. The display will now show you the first saved fault code.
To see the next codes—it usually stores up to four—just turn the knob one more click to the right for each one. Be sure to jot down every code you see. This is the critical info you need for troubleshooting.
Pro Tip: Clearing old codes after you've finished a repair is just as important as reading them. It wipes the slate clean. If the same code pops up again later, you know for sure that the problem hasn't been fully resolved.
To clear the codes, just press and hold the "Start/Pause" button for three seconds. Getting comfortable with these diagnostic modes is a game-changer for efficient repairs. In fact, properly using built-in diagnostics can cut down on repeat service calls by an estimated 30%, which saves everyone a lot of time and money. This process puts the power of a professional diagnostic tool right in your hands.
Troubleshooting Water Flow and Fill Errors
When your Mayag washer flashes a code like LF, F8 E1, or F8 E2, it's trying to tell you something is wrong with its most basic job: filling with water. These are some of the most common trouble codes we see, and they pop up when the machine is taking too long to fill or isn't filling at all. Either way, it stops your wash cycle dead in its tracks.
The good news? The cause is usually a simple mechanical issue, not a complicated electronic failure. All it takes is a methodical approach to figure out where the blockage or problem is. A little systematic diagnosis saves you from buying parts you don't need and gets your laundry day back on schedule.
Step-by-Step Diagnostic Walkthrough
Let’s start with the easiest and most frequent culprits first. You won't need any special tools for these first few checks, just a bit of patience.
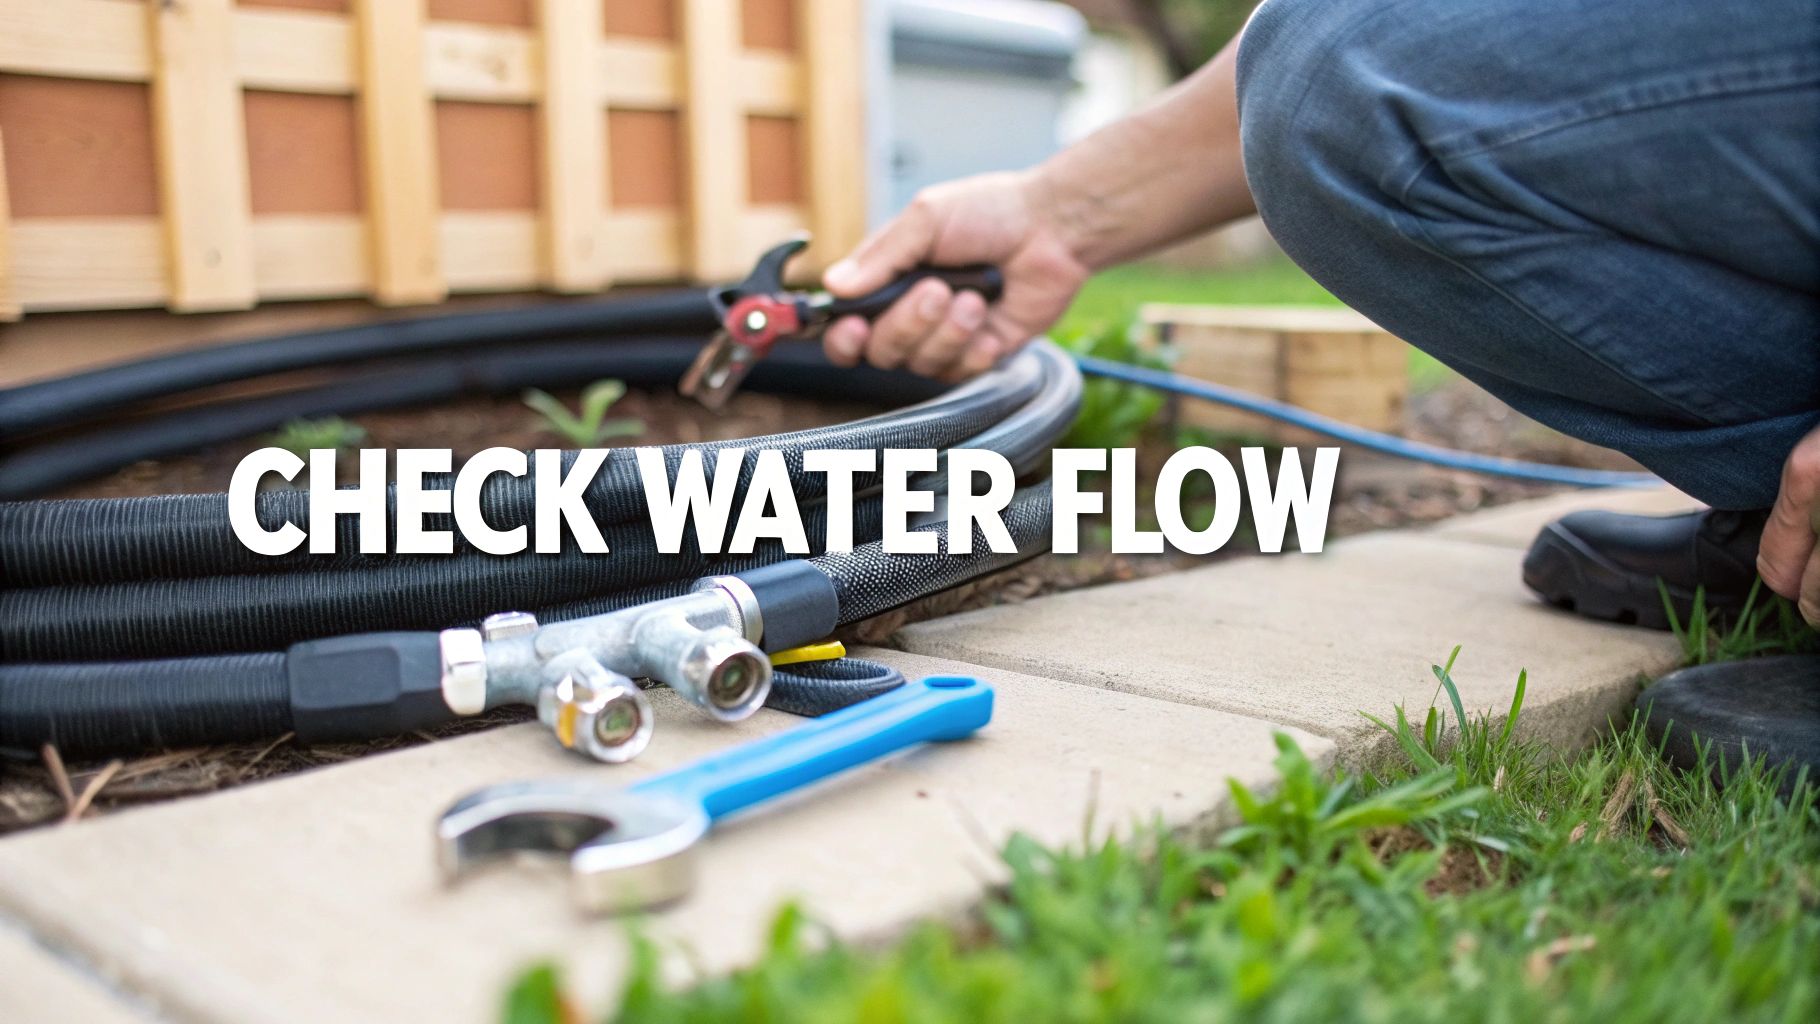
Check Your Water Supply: It sounds almost too simple, but you'd be surprised how often this is the problem. Make sure both the hot and cold water taps behind the washer are turned on all the way. They can get bumped or partially closed by accident.
Inspect the Inlet Hoses: Gently pull your washer away from the wall so you can see what’s going on behind it. Look at the hot and cold water hoses for any sharp kinks, twists, or bends that could be pinching off the water flow. If you see any, just straighten them out.
Clean the Inlet Valve Screens: This is a huge one. Over time, tiny filter screens inside the water inlet valve (right where the hoses connect to the washer) get clogged with sediment and mineral buildup. It's one of the most common reasons for a fill error.
Here's how to clean them:
- First, shut off the water supply at the wall taps.
- Unscrew the hoses from the back of the washer. Keep a small bucket or towel handy to catch any water still in the hoses.
- Using a pair of needle-nose pliers, gently pull out the little filter screens from inside the valve ports.
- Rinse the screens under a tap until they're completely clean. You might see more gunk come off than you'd expect.
- Pop the clean screens back in, reconnect the hoses tightly, and turn the water back on.
When the Simple Fixes Don't Work
So, you’ve confirmed the water is on, the hoses are straight, and the inlet screens are spotless, but that pesky error code is still there. Now we have to look a bit deeper. The problem could be internal.
The water inlet valve itself might be faulty. It's an electronic part that opens and closes to let water in, and like any component, it can fail. Another possibility is an issue with the pressure switch system—the switch and its attached hose are what tell the machine's computer how much water is in the tub. If that system isn't working right, the washer might think it's full when it’s actually empty.
Important Note: A slow fill is the main trigger for these codes, but other blockages can play a role. A really clogged-up dispenser drawer, for example, can sometimes slow down the water flow into the drum. For more on that, take a look at our guide on how to clean your washing machine soap dispenser.
If you've tried all these steps and the LF, F8 E1, or F8 E2 error won't clear, it’s probably time to call in a professional. Here at Advance Appliance Ltd, our technicians in Edmonton, Calgary, and Red Deer have the tools and expertise to quickly diagnose and fix a bad valve or a faulty pressure system.
Fixing Drainage and Excessive Suds Errors
If your Maytag washer flashes an Sd, Sud, or F9 E1 code, it's telling you it has a draining problem. These codes are a real headache, but they often pop up when the machine just can't pump the water out—and the culprit is usually what you're putting in with your clothes.
Excess suds are almost always the bad guy here. Using too much soap, or more often, the wrong kind of soap, creates a sea of foam. This foamy mess can confuse the washer's sensors and even physically block the drain system, stopping it from emptying properly.
Step-by-Step Drainage Troubleshooting
Before you jump to conclusions about a dead pump, run through these simple checks first. This is how we techs systematically rule out the easy stuff.
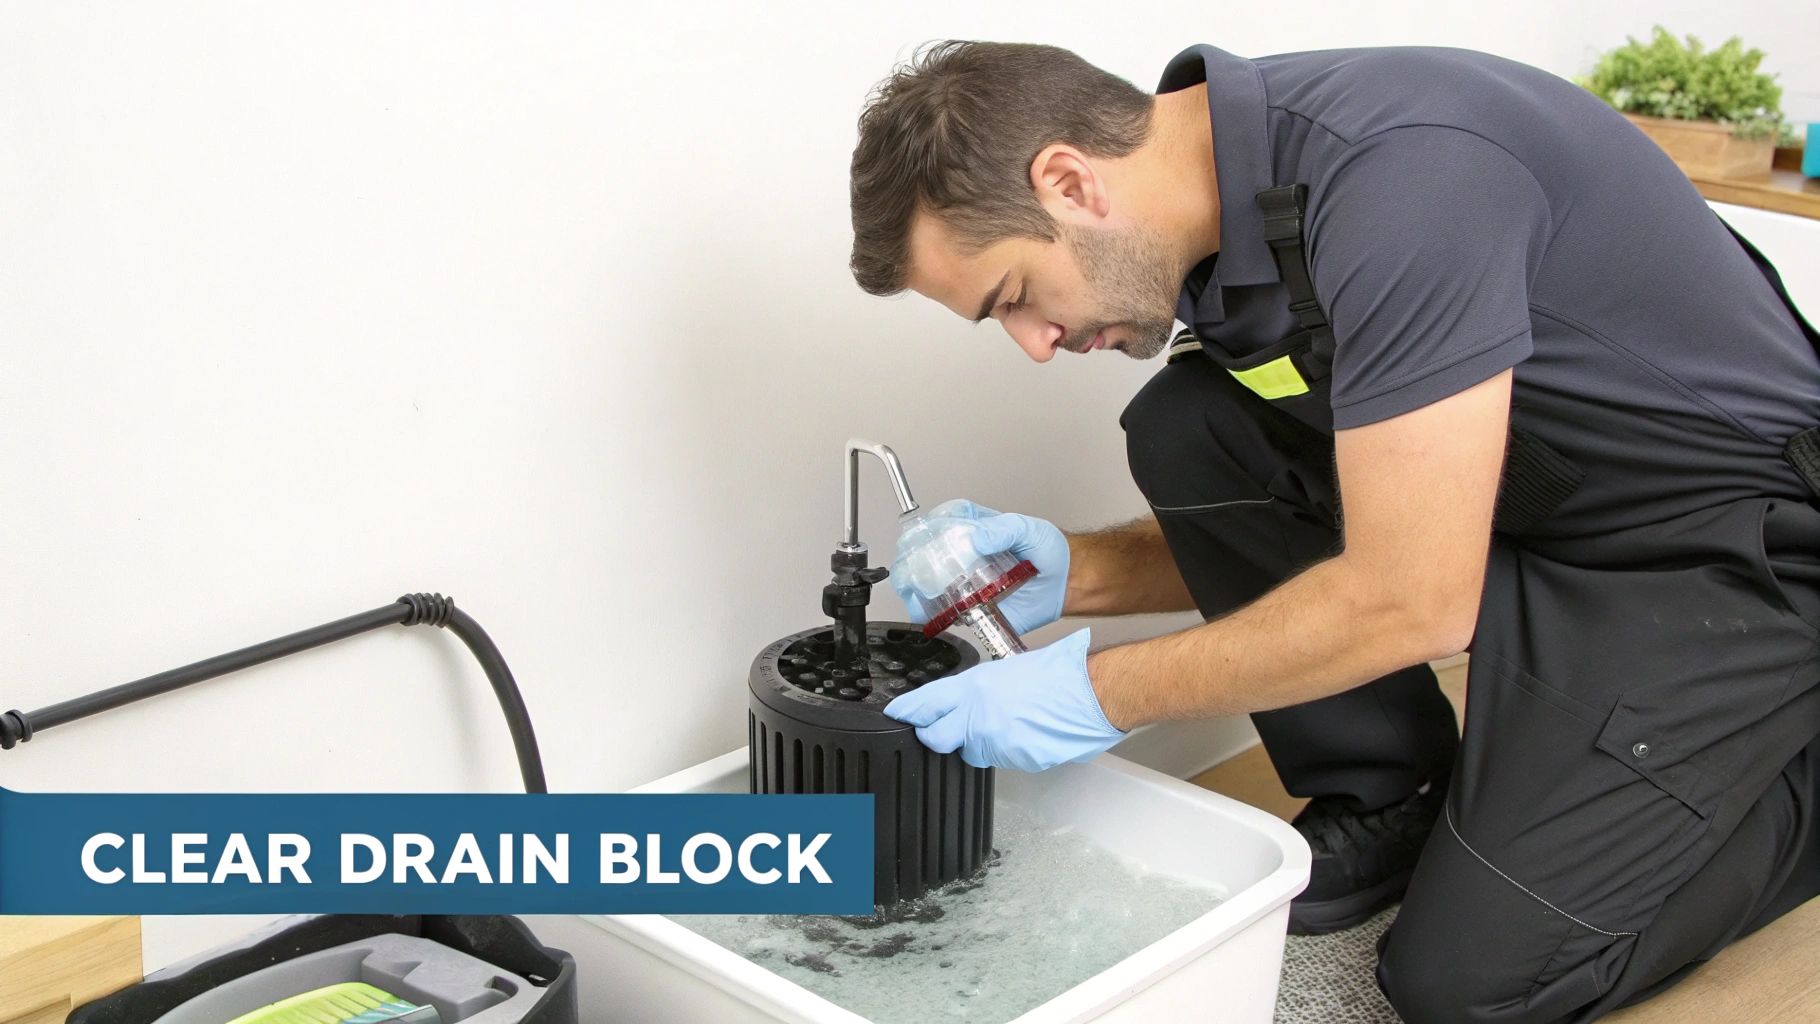
Run a Rinse and Spin Cycle: Got a drum full of bubbles? Your first move is to run a "Rinse & Spin" or "Drain & Spin" cycle. Don't add any more detergent. This will help knock down the foam and give the washer a chance to reset.
Inspect the Drain Pump Filter: Most front-load Maytags have a little door on the bottom-front corner. Pop it open. You'll see a round cap—that's the drain pump filter. Grab a shallow pan and a towel, put them underneath, and slowly unscrew the cap. Water will come out! Once it's drained, pull the filter out and clean off any lint, coins, hair, or whatever else has collected in there.
Check the Drain Hose: Take a look behind the washer. Is the drain hose kinked or squashed? Make sure it's clear. Also, check how far it's pushed into the standpipe on the wall. It shouldn't go in more than 15 cm (about 6 inches). Any deeper, and you can create a siphoning effect that messes with proper draining. For a deeper dive, check our guide on what to do when your washing machine is not draining or spinning.
Preventing Future Suds and Drainage Issues
The best fix is prevention. Getting your laundry habits right will keep these error codes from ever coming back, and it really boils down to one thing: your detergent.
As appliance repair pros, we see this all the time. Improper detergent use is a top reason for suds-related errors. In fact, nearly 25% of diagnosed Maytag washer errors we encounter involve drainage problems caused by too many suds, often because someone used regular soap instead of a high-efficiency (HE) one. This mistake makes the machine work harder and longer to drain, putting extra wear on the pump.
Key Takeaway: Always, always use detergent with the HE (High-Efficiency) logo. It’s made to create very few suds, which is exactly what modern washers need. And follow the measurements on the bottle—more is definitely not better here.
If you’ve cleaned the filter, straightened the hose, and switched to the right detergent but that stubborn F9 E1 code won't go away, your drain pump might be on its way out. For an expert diagnosis and fast service in Edmonton, Calgary, or Red Deer, the team at Advance Appliance Ltd is always ready to help.
Solving Lid Lock and Door Latch Problems
Seeing codes like LdL, LdU, or F5 E2 pop up on your Maytag washer? That’s your machine telling you it has a problem with the lid or door lock. This is a non-negotiable safety feature, and it’s designed to keep the washer from starting or spinning until it knows the door is shut tight and locked. While these codes can bring your laundry day to a grinding halt, the solution is often simpler than you'd think.
A faulty lock isn't just a minor issue—it's a complete showstopper. The washer's main control board won't even think about starting a cycle until it gets the all-clear signal from that latch. Getting to the bottom of these specific Maytag codes is your first step toward getting things running safely again.
Common Causes of Lid Lock Errors
Before you start pricing out new parts, it's always best to check for the simple stuff first. More often than not, the problem is mechanical, not electrical.
- Obstructions: It’s surprisingly common for small items—think a stray sock or a piece of a strap—to get wedged between the lid and the top of the washer. This physically stops the latch from engaging properly.
- Alignment Issues: Over hundreds of cycles, things can shift. The lid or the latch assembly might be just a smidge out of alignment, causing the lock mechanism to miss its mark.
- Physical Damage: The lock assembly has plastic parts that can crack or break after years of use or from an accidental bump.
Important Safety Note: Always, always unplug your washing machine from the wall outlet before you start poking around the lid lock assembly. It's a critical step to prevent any risk of electrical shock.
A Systematic Approach to Diagnosis
Start with a good old-fashioned visual inspection. Open the lid and take a close look at both the strike (the plastic piece on the lid) and the latch assembly (the part it clicks into on the washer). Are there any obvious cracks, bits of debris, or signs of heavy wear?
Next, double-check for simple blockages. Make sure no laundry is in the way. Sometimes, even a thick buildup of old detergent or fabric softener can cause just enough interference to stop the lock from working. A quick wipe-down with a damp cloth can work wonders.
If everything looks clean and intact, the issue might be electrical. The switch inside the lock can fail, or a connection might have wiggled loose between the switch and the main control board. While you can test these components with a multimeter, it’s a job best left to a professional if you aren't completely comfortable with it.
For anyone in Edmonton, Calgary, Red Deer, and the surrounding areas, a lid lock error that won't go away is a good reason to call in the experts. The technicians at Advance Appliance Ltd have the right diagnostic tools to figure out quickly if it’s a bad lock assembly or a more complicated control board problem, guaranteeing a safe and solid repair.
Deciphering Motor and Unbalanced Load Codes
When your Maytag washer flashes codes like OL (Overload), UL (Unbalanced Load), or the more technical F7 E1, it’s trying to tell you something's wrong with the drive system or the laundry load itself. These codes might look alarming, but they often point to simple issues that are easy to fix. Think of it as your machine protecting itself from potential damage.
The UL code is definitely the most common one you'll encounter. It just means the laundry has bunched up on one side of the drum, which would cause some serious shaking during a high-speed spin. Your washer is smart enough to hit the brakes on the cycle to prevent a laundry room earthquake.
The Go-To Fix for Most Unbalanced Loads
Before you start worrying about a mechanical failure, the first and best thing to do is check the laundry itself. A well-balanced load is absolutely key to your washer's long-term health and performance.
- Pop the Lid: Just pause the cycle and open the door.
- Rearrange the Clothes: Take a look inside. You'll probably find heavy, soaked items like towels or jeans tangled into a big ball. Manually pull them apart and spread everything evenly around the drum.
- Resume the Cycle: Close the lid, hit "Start," and let it get back to work. Almost every time, this will clear the UL code and the washer will finish the job.
The best fix is prevention, and that just means learning how to load the machine properly. Always mix large and small items. And never, ever wash a single heavy item—like a big bathmat—all by itself. It’s a guaranteed recipe for an unbalanced load.
When It's More Than Just an Unbalanced Load
While UL is all about balance, the OL code signals a different kind of struggle: an overload or too much friction. This could be as simple as stuffing too many clothes inside, which makes the motor work way too hard. But it can also mean a stray sock or coin has slipped between the tubs, creating drag that prevents the basket from spinning freely.
Then there's the F7 E1 (Motor Fault) code. This one is a bit more specific, telling you the main control board isn't getting the right speed signals from the motor. While it could point to a failing motor or a bad shifter, it’s often triggered by a severe overload or unbalanced load that the machine just couldn't overcome. It tried its best to spin, but simply couldn't get the job done.
Expert Insight: An unbalanced load is a common trigger for all sorts of washer problems. For a deeper dive into how proper loading impacts performance, check out our guide on common causes and fixes for why your Maytag MVWC565FW isn't washing clothes correctly.
If you’ve redistributed the load and checked for any stray items but these motor-related codes keep popping up, it might be time to consider a mechanical issue. We could be looking at a problem with the drive belt, motor capacitor, or the shifter assembly. Once you've ruled out the easy fixes, give Advance Appliance Ltd a call. Our technicians in Edmonton, Calgary, and Red Deer can pinpoint the problem with the drive system and get any faulty parts replaced for a safe, reliable repair.
Knowing When to Call a Professional
While many Maytag washer error codes are thankfully simple DIY fixes, some are your machine’s way of waving a big red flag. These codes point to deeper, more complex problems where a wrong move could cause more damage or, worse, become a safety hazard.
Knowing when to put the tools down is just as important as knowing how to use them. Anything involving your washer’s main electronic controls or high-voltage components is best left to someone who does this every day. You could turn a manageable repair into a complete replacement—or risk electrical shock—by trying to fix a complex circuit board on your own.
Identifying Professional-Level Problems
Certain error codes are pretty direct about telling you it's time to call in the cavalry. These usually relate to the main control board—the washer's brain—or the motor's internal workings. These are parts that need specialized diagnostic tools to test and replace safely.
A classic example is the F1 E2 code, which translates to a "Main Control Fault." This isn't a simple clog or a loose hose; it's a critical failure of the central circuit board that manages every single function of your washer. This is absolutely not a part to tinker with yourself.
Crucial Takeaway: Codes like F1 E2 (Main Control Fault) or stubborn motor control errors (like a recurring F7 E1) are almost always a job for a pro. These aren't user-serviceable components, and a mistake here could be costly.
DIY vs Professional Repair Decision Guide
Deciding whether to tackle a repair yourself or call a technician can be tough. We've put together this quick guide to help you make a smart, safe choice based on the type of error code you're seeing.
| Error Code Type | Potential DIY Fixes | When to Call a Professional | Estimated Professional Repair Cost (CAD) |
|---|---|---|---|
| User & Setup Errors | Check water supply, ensure lid is closed, balance load, clear drain filter | If basic checks fail to resolve the code | $120 – $250 |
| Drain & Fill Errors | Inspect and clear drain hose, check fill hoses for kinks or clogs | When the drain pump is humming or dead, or if water valves are faulty | $180 – $350 |
| Mechanical Component Errors | Tighten loose belts, check for obstructions in the drum or pump | If bearings are seized, the transmission is grinding, or shocks have failed | $250 – $600+ |
| Control Board & Motor Errors | Power cycle the machine (unplug for 5 minutes) to reset the board | For any persistent motor, sensor, or main control board fault codes | $300 – $750+ |
Ultimately, if a simple fix doesn't work after one or two attempts, or if the repair involves taking apart major electrical or mechanical systems, calling a professional is the safest and most cost-effective path forward.
More Red Flags: When DIY Is a Bad Idea
Beyond specific codes, certain situations should immediately tell you it's time for an expert. If you've gone through all the recommended troubleshooting steps for an error and it just won't clear, something more serious is going on.
Treat these scenarios as definite signs to stop:
- Persistent Electrical Issues: Any suspicion of a problem with the main control board, internal wiring, or power supply.
- Major Mechanical Failures: Things like a seized drum bearing, a grinding transmission, or a busted motor require a full teardown and special tools.
- Mysterious Water Leaks: If you've checked every hose and connection but can't find the source of a leak, it’s likely an internal seal that's tough to access and replace.
If you're dealing with a stubborn error code or any of these more serious issues, don't hesitate to seek expert help. For reliable and fast Maytag appliance repair in Edmonton, Calgary, or Red Deer, our certified technicians at Advance Appliance Ltd have the right tools and expertise to find the root cause and get your washer running safely again.
FAQ on Maytag Washer Codes
When your Maytag washer starts flashing a code, it’s natural to have a few questions. We get calls about these all the time, so we’ve gathered some of the most common ones right here. This section is all about giving you quick, straightforward answers to get your laundry day back on schedule.
How Do I Reset My Maytag Washer After An Error Code?
So you've fixed the problem, but the pesky error code is still staring back at you. Clearing it is usually the last step. The easiest and most common way is to give the machine a quick power cycle.
Just unplug it from the wall outlet. Don't be impatient—leave it unplugged for at least a full minute. This gives the internal computer, the main control board, enough time to fully discharge and forget the error.
Once you plug it back in, some models have a "master reset" trick: open and close the washer door six times in about 12 seconds. This is a manual signal to the control board to clear out any logged fault codes. If that doesn't do it, your best bet is to check the diagnostic mode steps we covered earlier, as the process can vary slightly between models.
Why Is My Washer Showing A Code But Still Working?
It's definitely confusing when your washer throws up an error code but keeps chugging along with the cycle. Think of these codes less as a hard stop and more as a warning flag. The machine is telling you it ran into a problem but is trying to fix it on its own.
A classic example is the ‘Sd’ code, which means you’ve got way too many suds. When the washer detects a foam party in the drum, it doesn't just shut down. It pauses the main cycle and tries to knock down the suds, often by adding a bit of water or tumbling the clothes without water. If it works, the cycle continues. If not, it'll eventually give up to avoid damage. It's always smart to figure out why the code appeared to prevent a bigger headache down the road.
Can I Use Regular Detergent In My HE Maytag Washer?
Let me be crystal clear on this one: absolutely not. Using old-school, non-HE detergent in a modern high-efficiency (HE) Maytag is one of the most common—and completely avoidable—mistakes we see.
Regular detergents are designed to create a mountain of suds, which is the exact opposite of what an HE machine needs. These washers use a fraction of the water, so they can't handle all that foam.
The extra suds from non-HE soap do more than just flash an 'Sd' or 'Sud' code. All that foam acts like a cushion, stopping your clothes from tumbling against each other and getting properly clean. Worse, it leaves behind a slimy residue that breeds odours and can eventually wreck the machine's sensitive electronic sensors. Do yourself a favour and always look for the little HE logo on the bottle.
What Does The LF Code Mean If My Water Pressure Is Fine?
The ‘LF’ (Long Fill) code is a real head-scratcher for many homeowners. You turn on the tap and the water pressure seems great, yet the washer insists it's taking too long to fill. That's because the machine isn't measuring the pressure at your wall—it's timing how long it takes for water to reach the right level inside the drum.
If you know your home's water pressure is solid, the bottleneck is somewhere between the tap and the tub. Here’s how to play detective:
- Check for Kinks: Pull the washer out a bit and make sure the hot and cold water hoses aren't pinched, twisted, or squashed flat against the wall. It happens more often than you'd think.
- Clean the Inlet Screens: If the hoses look good, the next culprit is almost always clogged filter screens. These are tiny mesh filters sitting right where the hoses connect to the back of the washer. Over time, sediment, rust, and mineral deposits build up and choke the water flow, triggering that frustrating 'LF' code.
If you've gone through these common questions and your washer is still flashing an error, don't keep struggling with it. For fast, professional, same-day or next-day appliance repair in Edmonton, Calgary, Red Deer, and surrounding communities, the certified experts at Advance Appliance Ltd. are ready to help. You can book your service with confidence by visiting us at https://advanceappliance.ca.