So, your beloved KitchenAid mixer has decided to take an unscheduled break. Before you start mourning your next batch of cookies, you need to decide: is it worth fixing, or is it time for a new one?
The answer usually boils down to simple economics. A quick gear replacement might only run you $20-$50 for the part, which is a lot easier to swallow than the cost of a brand-new mixer.
Evaluating if a Repair is Worth It
When that familiar whir turns into a grinding noise, or worse, complete silence, it's easy to assume the worst. But these mixers were built like tanks for a reason, and you'd be surprised how many "fatal" issues are actually quite fixable. The real decision to repair comes down to the problem itself, how much it'll cost, and whether you're comfortable getting your hands a little greasy.
KitchenAid has a stellar reputation for a reason. These aren't throwaway gadgets. If you want a deeper dive into their build quality, understanding what makes KitchenAid appliances good can give you the confidence to choose repair over replacement.
Weighing Cost Against Value
Let's talk numbers. A shiny new KitchenAid Artisan Series mixer can easily cost over $500, and the Professional models climb even higher. Now, compare that to the cost of the parts that most commonly fail:
Worm Gear: This is the hero part. It's designed to fail under extreme stress to protect the motor, and a new one costs just $15-$25.
Carbon Motor Brushes: If your mixer won't start, this is a likely culprit. A new pair is usually less than $20.
Speed Control Plate: For mixers with wonky or unpredictable speeds, this part is often the fix, running about $30-$60.

As a rule of thumb, if the total repair cost is under 25-30% of the price of a new mixer, fixing it is a no-brainer.
Assessing the Problem's Complexity
Not all repairs are created equal, of course. Swapping out the motor brushes is a fantastic first-timer project that only needs a few basic tools. But if you're dealing with a seized motor or a tricky electrical fault, it might be time to tag in a professional.
Here’s the inside scoop: KitchenAid mixers are intentionally designed to be serviceable. The parts that fail most often are cheap and easy to access. They act like a fuse, sacrificing themselves to save the expensive motor from burning out.
To make things even clearer, here's a quick table to help you decide when to DIY and when to call us.
DIY vs Professional Repair Decision Matrix
| Symptom | Potential Cause | DIY Feasibility | When to Call a Pro |
|---|---|---|---|
| Won't start | Faulty power cord, worn motor brushes, bad switch | High (for cord/brushes), Medium (for switch) | If basic checks fail or you suspect the control board. |
| Grinding noise | Worn or broken worm gear | High | If the noise continues after gear replacement; could be a motor bearing. |
| Speed issues | Speed control plate, governor assembly | Medium | If you're uncomfortable with wiring or calibration. |
| Leaking oil | Grease separation (normal over time) | High (requires re-greasing) | If it's a large, sudden leak or you're not up for a messy job. |
Ultimately, if the repair seems too complex or you just want the job done right without the hassle, that's what we're here for. For our customers in Alberta, Advance Appliance Ltd provides expert service in Edmonton, Calgary, and Red Deer, making sure your mixer gets back to work, fast.
Setting Up for a Safe and Successful Repair
A successful Kitchen-Aid repair starts long before you even touch a screwdriver. Getting your space and tools ready is probably the single biggest difference between a smooth, satisfying fix and a frustrating afternoon chasing lost screws. A few minutes of prep makes the whole job easier and, more importantly, safer.
First thing's first, and this is the one step you can't ever skip: unplug the mixer. Don't just flip a switch; pull the cord right out of the wall. This is non-negotiable for eliminating any risk of electrical shock when you're working on the internal parts. It’s the simplest step, but it’s the one every single pro does, every single time.
Creating Your Repair Zone
Next, find a good spot to work. You'll want a sturdy, well-lit surface like a kitchen table or a workbench. I always recommend laying down an old towel or a soft mat. This does two things: it protects the mixer's paint job from getting scratched, and it stops tiny screws from rolling off into another dimension.
An organized workspace is a happy workspace. Grab a few small containers to keep track of all the screws and little bits you'll be removing. Old yogurt cups, magnetic parts trays, or even just a piece of masking tape folded sticky-side-up will do the trick. Try to group them by where they came from (e.g., "rear cover screws," "gear housing screws"). Trust me, this will save you a massive headache when it's time to put everything back together.
Pro Tip: Your smartphone is your best friend here. Snap pictures at every stage of disassembly. These visual notes are a lifesaver when you're trying to remember how a specific wire was routed or which screw went where. It’s the modern-day version of leaving a trail of breadcrumbs.
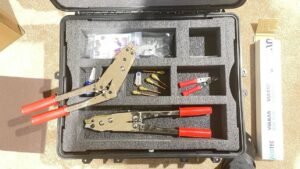
Gathering the Essential Tools
Having the right tools on hand prevents you from stripping a screw head or cracking a plastic part. You don't need a professional mechanic's toolbox, but a few key items are essential for most KitchenAid repairs. Before you start, make sure you've got these nearby:
Screwdrivers: You’ll definitely need a Phillips head and a flathead. A set with a few different sizes is your best bet.
Pliers: A pair of needle-nose pliers is perfect for grabbing small wires and clips in those tight, hard-to-reach spots.
Putty Knife or Flat Pry Tool: This is great for gently popping open housing parts without scratching or denting them.
Punch and Hammer (or a Pin Punch Set): This is a must-have for tapping out the pin that holds the planetary gear assembly. It's a common step for almost any internal repair.
Multimeter: If you're tackling an electrical problem, like a mixer that won't turn on at all, a multimeter is the only way to test for continuity in the power cord, switches, and fuses. If this sounds a bit advanced, you can read more about whether it's safe to repair your own appliances and what's involved.
Finding Your Model Number
Last but not least, find your mixer's model and serial number. It’s usually on a silver sticker on the underside of the base. Take a photo of it or write it down. This number is your golden ticket for ordering the correct OEM (Original Equipment Manufacturer) parts and finding the right repair diagram for your specific machine. It guarantees you get parts that fit perfectly and will last.
Troubleshooting Common Mixer Failures
When your trusty KitchenAid mixer suddenly gives up the ghost, it feels like a betrayal. But don't panic or start pricing out a new one just yet. Most of the time, these failures aren't fatal. They're just puzzles, and with a bit of logical diagnosis, you can usually get to the bottom of it. Instead of just guessing, we're going to walk through the symptoms like a seasoned pro to pinpoint the real cause.
This methodical approach is the secret to a successful repair. You want to be sure of the problem before you even think about ordering parts. The flowchart below lays out the simple but critical prep work for any diagnostic job.
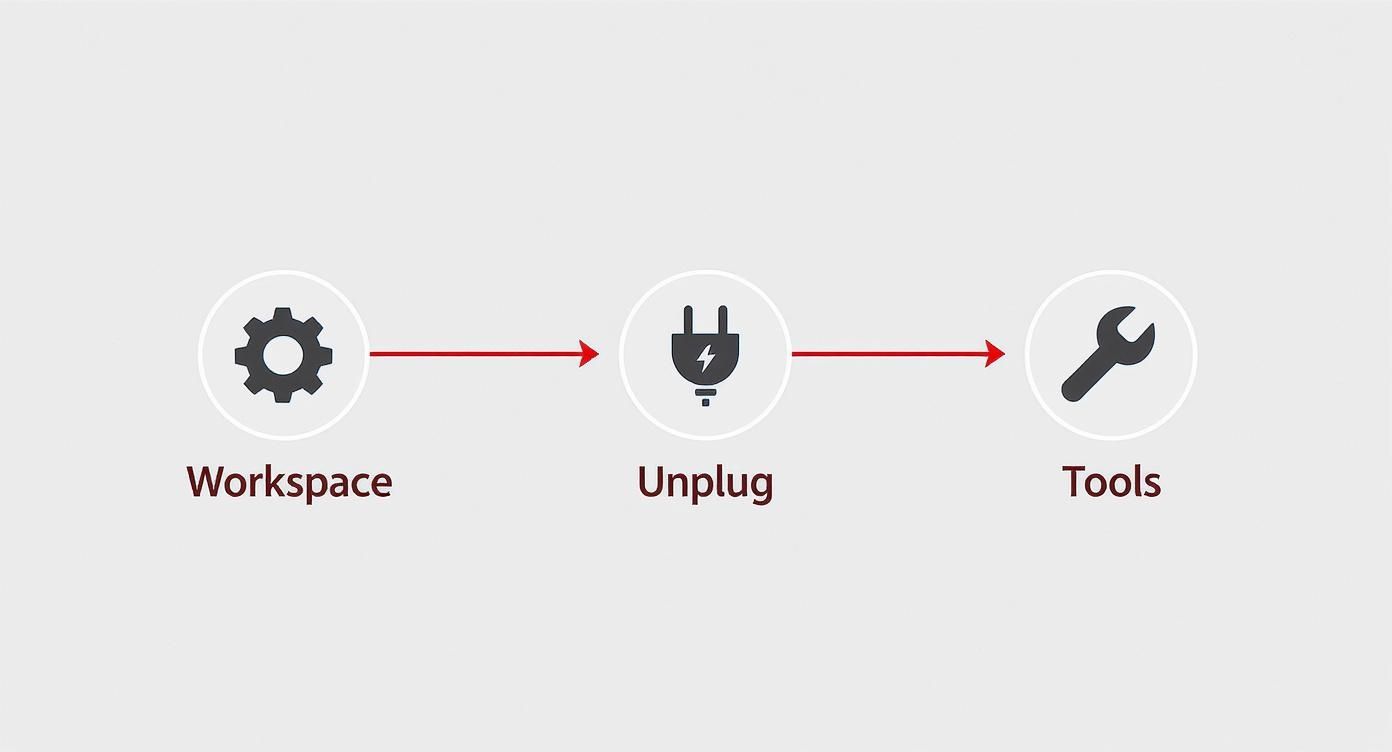
As you can see, a good repair starts with a safe, organized workspace—long before you lay a hand on the appliance itself. With that mindset, let's dive into the most common mixer ailments.
My Mixer Is Completely Dead
It’s the most common and heart-stopping scenario: you flip the switch and get nothing. No hum, no twitch, no signs of life. Before you assume the motor is fried, let's start with the simple stuff and work our way in.
First, check the power source. Is the outlet even working? Grab your phone charger or a lamp and plug it in to be sure. If the outlet is dead, you've probably just tripped a breaker. And try to plug the mixer directly into the wall—faulty extension cords are a common culprit.
If the outlet has power, give the mixer's cord a once-over. Look for any cuts, frays, or dark marks, especially right where the cord enters the mixer body. All that wrapping and unwrapping over the years can cause the internal wires to snap.
A dead mixer often comes down to two common culprits: worn-out carbon motor brushes or a tripped thermal overload protector. Both are safety features designed to protect the motor, and checking them is pretty straightforward.
Did the mixer die mid-job while you were kneading a particularly heavy dough? It might just be overheated. There's a thermal protector built in to cut the power and prevent motor burnout. Unplug it, and give it a good 30 minutes to cool down completely before you try again.
Still nothing? The carbon motor brushes are your next stop. These little blocks are designed to wear down over time. You'll find them under two black screw caps on opposite sides of the motor head. If they look chipped or are shorter than a quarter-inch, it's time to replace them.
That Awful Grinding Noise
A loud, mechanical grinding is an ugly sound, but it's often pointing you to a very specific, and replaceable, part. Your mixer has a little hero inside its gearbox called the sacrificial worm gear. It's made of a softer material for a very good reason: it’s designed to strip itself apart under extreme load.
It sounds brutal, but it's actually a brilliant bit of engineering. The worm gear destroys itself to save the much more valuable motor from burning out. So, while that horrible crunching sounds like the end of the world, it's usually just the worm gear telling you it did its job. We talk more about what different sounds mean in our guide to appliance noises that need repair.
Speed Control Is All Over the Place
This is another classic issue. Maybe your mixer only wants to run at top speed, no matter where you set the lever. Or perhaps it jumps around and won't hold a steady speed. This is almost always a problem with the speed control plate or the governor assembly.
The speed control plate has a set of contact points that tell the motor how fast to run. Over time, these contacts can get gunked up, corroded, or just knocked out of alignment. Sometimes a quick spray of contact cleaner and a gentle nudge back into place is all it takes. If you see black scorch marks or serious wear, though, the whole plate will need replacing.
Why Is My Mixer Leaking Oil?
Finding a puddle of dark, greasy oil under your mixer is messy, but it’s rarely a sign that something has broken. The gearbox is packed with a special food-grade grease to keep things running smoothly.
After years of heating up and cooling down, that grease can start to separate. The oil component becomes thin enough to seep out through the seams in the motor head. A tiny bit of "sweating" can be normal on an older machine, but a noticeable leak means it's time for a refresh. The fix involves opening the gearbox, cleaning out every bit of the old grease, and repacking it with a fresh batch. It's more of a maintenance job than a repair, but it's crucial for the long-term health of your machine.
Alright, you've figured out what's wrong with your KitchenAid mixer. Now for the fun part: getting your hands dirty and bringing that trusty machine back to life. This is where the real satisfaction comes from, turning what seems like a complicated job into a totally manageable project.
We're going to walk through the most common fixes I see, the ones you can definitely handle at home. With the right parts and a bit of patience, you can get the job done right and save a good chunk of change in the process.
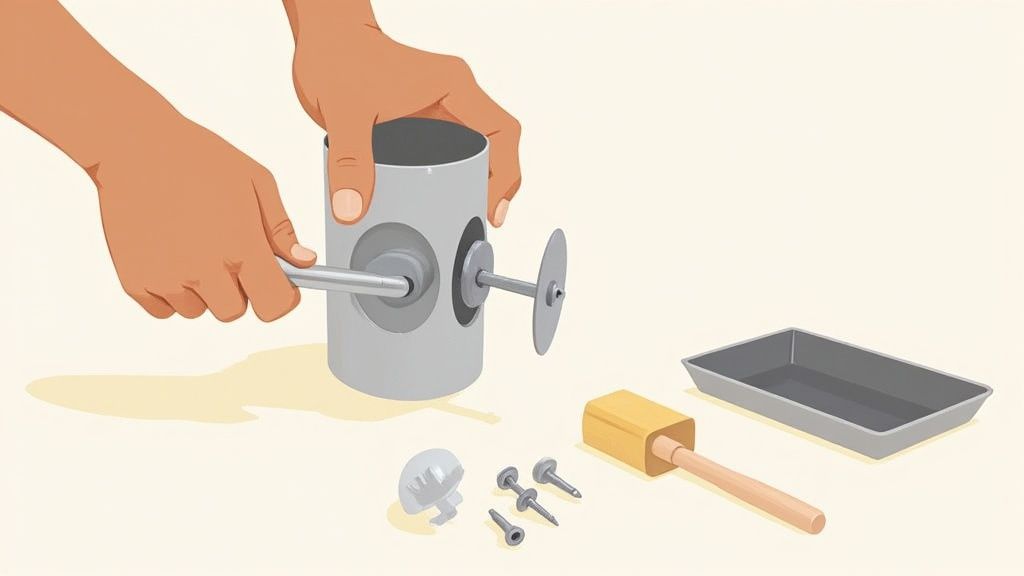
Replacing the Sacrificial Worm Gear
If your mixer is making a horrible grinding sound, don't panic. That noise is often a sign that its most important safety feature just did its job. The worm gear is designed to be the weak link—it breaks under extreme stress to save your motor from burning out. Replacing it is a classic, effective fix.
To start, get the rear cover and drip ring off, then gently lift the motor housing away. This will expose the gear tower, which is packed with grease. You're looking for the worm gear, usually made of nylon or bronze, which connects directly to the motor's drive.
Getting it out requires removing the pin that holds the planetary assembly (the part where your attachments connect). A pin punch is your best friend for this task. Once the planetary is free, you can access the gear tower, pull out the old, shredded gear, and start cleaning.
Crucial Tip: Don't even think about skipping the cleaning step. Any leftover metal filings or plastic shavings from the old gear will chew up the new one in no time. You have to meticulously scrape out all the old grease and replace it with fresh, food-grade lubricant before putting in the new part.
Swapping Out Worn Motor Brushes
Is your mixer completely dead? If you've already checked the outlet and the power cord, worn motor brushes are the next logical suspect. These little carbon blocks are meant to wear down over time, and thankfully, replacing them is one of the easiest and cheapest repairs you can do.
You don't even need to open the main housing to get to them. Look for two large, flat-head screw caps on opposite sides of the motor head. Be ready when you unscrew them—they're often under a bit of spring tension.
Inside each cap, you'll find the carbon brush and its spring. If a brush is chipped, cracked, or worn down to less than a quarter-inch, it’s time for a new pair. And it’s critical to replace both brushes at the same time for even wear and proper motor performance. Just pop the new ones in, making sure the curved side of the brush matches the curve of the motor's commutator, and tighten the caps back on.
Adjusting the Speed Control Plate
If your mixer only runs on high speed or can't seem to hold a steady pace, the speed control plate is likely the problem. This part is located inside the rear of the mixer head and uses a series of contacts to regulate power to the motor.
Once you have the mixer open, you'll spot the speed control assembly connected to the speed lever. Sometimes, the plate has just shifted slightly. Try carefully loosening its mounting screws and making tiny adjustments to see if that restores proper function.
Take a close look at the contact points. If they're just covered in grime or carbon dust, a quick spray with electrical contact cleaner might be all it needs. But if you see black scorch marks or the contacts are obviously worn down, the whole plate needs to be replaced.
The Messy but Necessary Re-Greasing Job
An oil leak looks bad, but it’s rarely a sign of a major failure. It usually just means the food-grade grease inside the gearbox has separated after years of use, letting the oil component seep out. The only real fix is to clean it all out and repack it with fresh grease.
This is a job best done at the same time as a worm gear replacement, since you'll already have the gearbox open. It involves taking the whole gear tower apart and cleaning every single piece.
Key steps for a successful re-grease:
Scrape It Out: Use a putty knife and plenty of paper towels to get every last bit of old, separated grease out of the housing and off the gears.
Degrease: Use a good degreaser to clean the individual gears until no old residue is left.
Repack Generously: Apply new food-grade grease to the gears and pack it into the housing. Don't be shy; you want everything thoroughly lubricated.
Reassemble: Carefully put the gear tower back together, making sure everything meshes smoothly before you close it all up.
The parts for these common repairs are surprisingly affordable, often costing between $15 and $60. For comparison, professional service for a KitchenAid stand mixer repair in California, including parts and labour, typically ranges from $149 to $179. Tackling these fixes yourself offers significant savings and a real sense of accomplishment. Our comprehensive guide to DIY appliance repairs has more tips to help you decide which projects you're ready for.
Knowing When to Call a Repair Professional
Every good DIYer knows their limits. While you can tackle a lot of common KitchenAid mixer fixes yourself, some problems are best left to a trained professional. It's not about giving up; it's about making a smart call to protect you and your mixer.
There are a few clear red flags that mean you should unplug the machine and step away. If you see sparks, smell that distinct electrical burning odour, or trip a breaker that won't reset, that's a hard stop. Likewise, a motor that's completely seized—it won't budge at all, even with the gears out of the way—signals a serious internal failure that's more than a simple parts swap.
Issues Best Left to the Experts
Trying to force a complex repair without the right know-how can quickly turn a fixable appliance into a very expensive paperweight. It’s crucial to recognize when to hand things over to someone with years of experience under their belt.
Here are a few situations where calling a pro is the safest and most reliable move:
Suspected Electrical Faults: Anything to do with the main power switch, internal wiring, or the control board requires specialized diagnostic tools. It's just not safe to guess.
A Completely Seized Motor: If the motor just hums without turning, or makes no sound at all after you've already ruled out the carbon brushes, the problem is likely a deep internal failure.
Damaged Housing or Frame: A crack in the main housing or a bent frame isn't just a cosmetic issue—it can throw the whole machine out of alignment and cause even more damage. This repair often requires professional-grade tools.
Persistent Grinding After Worm Gear Replacement: You replaced the worm gear, but that awful grinding sound is still there. The real culprit might be the motor bearings or another gear in the transmission, which are much tougher to get to.
When you hire a professional, you're not just paying for a fix. You're investing in peace of mind. A certified technician will find the root cause, not just patch up a symptom, and they'll stand by their work with a solid warranty.
The Benefits of Professional Service in Alberta
For those of us in Edmonton, Calgary, and Red Deer, calling a local expert like Advance Appliance Ltd. makes a world of difference. Our technicians come equipped with genuine OEM parts, so you know you're getting a perfect fit and long-term reliability. We use advanced diagnostic gear to pinpoint the exact problem, which saves you time and the headache of a misdiagnosis.
Plus, a professional repair comes with a service warranty covering both parts and labour. That guarantee protects your investment and ensures the job is done right the first time. Honestly, understanding when to call an appliance repair technician is often the most critical step in the whole process.
Of course, cost is a big factor. Whirlpool Corporation notes that out-of-warranty KitchenAid repairs often run between $149 and $450 for parts and labour. Stand mixer repairs usually land in the lower-to-middle part of that range. When you weigh that against the cost of a new mixer, professional service often comes out as the more cost-effective choice, especially for complex jobs. You can learn more about KitchenAid's service options directly from them. When the fix gets tricky, letting an expert handle it is the smart, safe, and surprisingly affordable way to go.
Your Top KitchenAid Repair Questions Answered
Alright, let's dive into some of the questions we hear all the time when it comes to keeping a KitchenAid stand mixer running smoothly. Getting these details right can be the difference between a quick tune-up and a major repair down the road.
How Often Should I Re-Grease My Mixer?
This is easily the most common question, and the honest answer is: it depends on how much you bake.
For the average home baker using their mixer a couple of times a month, re-greasing it every 3 to 5 years is a perfect schedule. This simple bit of maintenance keeps the gears happy and stops that dreaded oil from separating and leaking out.
But if your mixer is a real workhorse—churning out dense bread dough several times a week or running daily—you'll want to be more proactive. For heavy use, think about a re-grease every 1 to 2 years. The idea is to swap out the old grease before it breaks down completely.
Can I Use Just Any Food-Grade Grease?
You might think any food-safe grease will do, but this is one area where you don't want to cut corners. It's really important to use a grease that's specifically made for stand mixers. The original stuff is engineered to handle the exact heat and pressure your mixer's gearbox generates.
Using the wrong grease can cause a whole mess of problems:
Poor Lubrication: Some greases are just too thin. They won’t coat the gears properly, leading to grinding and premature wear.
Overheating: If the grease has the wrong consistency, it can make the motor struggle, causing it to overheat.
Separation: A grease not designed for this job will almost certainly break down and leak much faster than the proper stuff.
Do yourself a favour and stick with a high-quality, NSF H-1 registered food-grade grease formulated for stand mixers. It's a small price to pay to protect the expensive motor and gears inside your machine.
Is It Normal for the Mixer Head to Get Warm?
Yes, a little bit of warmth is totally normal. The motor housing is designed to get warm to the touch, especially when it's been working hard on something like a big batch of bread dough. That metal housing is actually helping to pull heat away from the motor.
However, if the head gets uncomfortably hot to touch, that’s your mixer telling you something is wrong. It could mean the machine is overloaded, the grease is shot and isn't lubricating anymore, or another internal problem is making the motor strain. If it gets that hot, turn it off and give it a good 30-minute cool-down.
Where Do I Find My Mixer’s Model and Serial Number?
You'll absolutely need your mixer's model and serial number to order the right parts for your KitchenAid stand mixer repair. Thankfully, it's easy to find. Look for a silver or white sticker on the underside of the mixer's base.
Just lay the mixer gently on its side on a towel (to avoid scratches). The sticker will have the "Model No." and "Serial No." clearly listed. Snap a quick picture of it with your phone—that way, you’ll always have it ready when you're hunting for parts online.
When a repair starts to feel like it's over your head, or you just want the peace of mind that comes with a professional job, Advance Appliance Ltd is ready to step in. Our certified technicians offer expert KitchenAid stand mixer repair across Edmonton, Calgary, and Red Deer. Book your service with us today and get back to baking without the stress. Learn more and schedule your appointment at https://advanceappliance.ca.