That sight of a puddle spreading out from your washing machine is enough to make any homeowner's heart sink. It’s a moment of pure panic, but the most important thing is to act quickly—and safely—to stop water damage and avoid electrical hazards. Your first moves should be all about control: cut the power, shut off the water, and contain the spill.
What to Do First When Your Washer Is Leaking
Discovering water pooling around your appliance can feel overwhelming, but a calm, methodical approach will make all the difference. Right now, it’s not about finding the cause of the leak; it’s about controlling the situation. Acting decisively in these first few minutes can prevent a small problem from snowballing into a major disaster involving ruined floors, damaged subfloors, or even compromised electrical systems. The goal is to safely stop the flow of water and electricity before you even think about troubleshooting.
Before you get started, here's a quick checklist to guide your immediate actions.
Immediate Action Checklist for a Leaking Washer
This table breaks down the critical first steps to ensure your safety and prevent the water damage from getting any worse.
| Action | Why It's Important | Quick Tip |
|---|---|---|
| Cut the Power | Water + electricity = extreme danger. This is non-negotiable for preventing electric shock. | If you can't safely unplug it, go straight to your electrical panel and flip the breaker for the laundry room. |
| Turn Off Water Supply | Stops more water from feeding the leak, preventing further damage. | Find the hot (red) and cold (blue) taps behind the washer and turn them clockwise until they stop. |
| Soak Up the Water | Minimizes damage to flooring, baseboards, and subfloors, and prevents mould. | Use old towels or a mop for small spills. A wet/dry shop vac is your best friend for larger puddles. |
Once you've run through these steps, you've successfully contained the emergency and can move on to the next phase without risking your safety or your home.
Prioritize Electrical Safety Above All
I can't stress this enough: water and electricity are a dangerous mix. Before you even think about stepping into a puddle, your absolute first priority is to kill the power to the washing machine. If you can safely reach the outlet without touching any water, go ahead and unplug the machine.
But if the plug is too close to the puddle or is otherwise out of reach, don't risk it. Head straight for your home's main electrical panel and switch off the breaker that controls the laundry room. This is a non-negotiable safety step that ensures you can manage the water spill without the risk of a serious electric shock.
Shut Off the Water Supply
With the power safely disconnected, your next move is to cut off the water supply feeding the machine. Look behind your washer, and you should see two water valves—one is typically red for hot, and the other is blue for cold.
- Turn both handles clockwise as far as they’ll go to shut them off completely. If you have lever-style handles, turn them so they are perpendicular to the hoses.
- If the valves are seized up or you can't reach them, you may need to shut off the main water supply to your entire house for the time being.
By cutting both power and water, you've effectively put a lid on the immediate emergency. You’ve stopped the leak from getting worse and created a safe environment to assess the damage and clean up the mess.
Contain the Spill and Protect Your Property
Now you can shift your focus to damage control. Grab old towels, blankets, or a mop and start soaking up all the standing water. If you’re dealing with a significant amount of water, a wet/dry shop vacuum is an invaluable tool for getting it up quickly.
The idea is to get the floor as dry as you can, as fast as you can. This helps prevent water from seeping into your flooring, baseboards, or the subfloor beneath, which can lead to long-term headaches like warping, rot, and mould growth. Once you've managed the immediate cleanup, you'll be in a much better position to start troubleshooting.
To be even more prepared for any appliance repair situation, it’s a good idea to know the things you should do before getting your appliance repaired. A little prep work can make the whole process much smoother.
How to Find the Source of the Leak
Alright, you've handled the immediate emergency. Now it's time to put on your detective hat. A leaking washing machine almost always leaves a trail of clues, and the good news is that most leaks come from a handful of common, easy-to-access parts. The trick is to work from the outside in, checking the simplest culprits first before you even think about opening up the machine itself.
Your goal here is a systematic inspection. By following a logical path, you can pinpoint exactly where that water is coming from, which is the most critical step. It tells you whether you're looking at a simple fix, a part that needs replacing, or if it's time to call in a pro.
Before you start, just a quick reminder that those initial safety steps are non-negotiable.
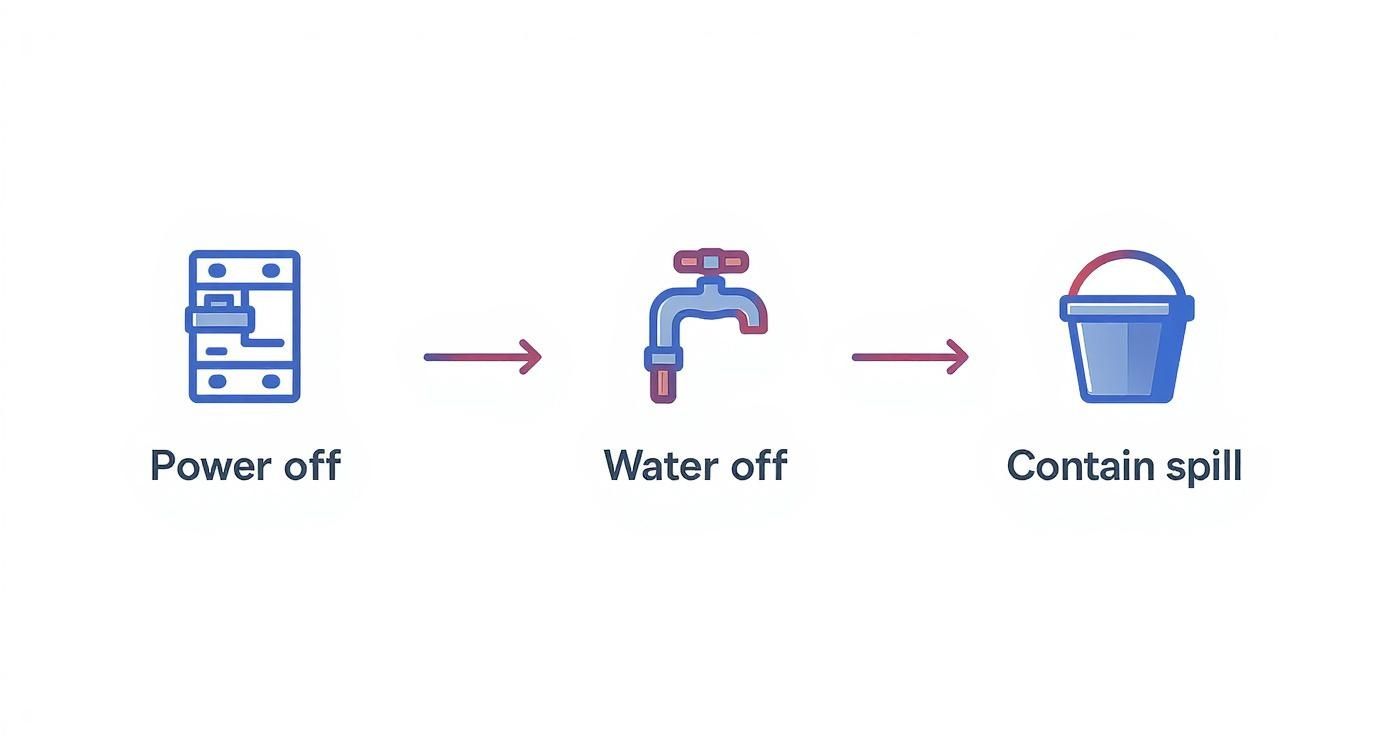
Seriously—Power Off, Water Off, and Contain Spill. These actions create a safe space for you to get to work.
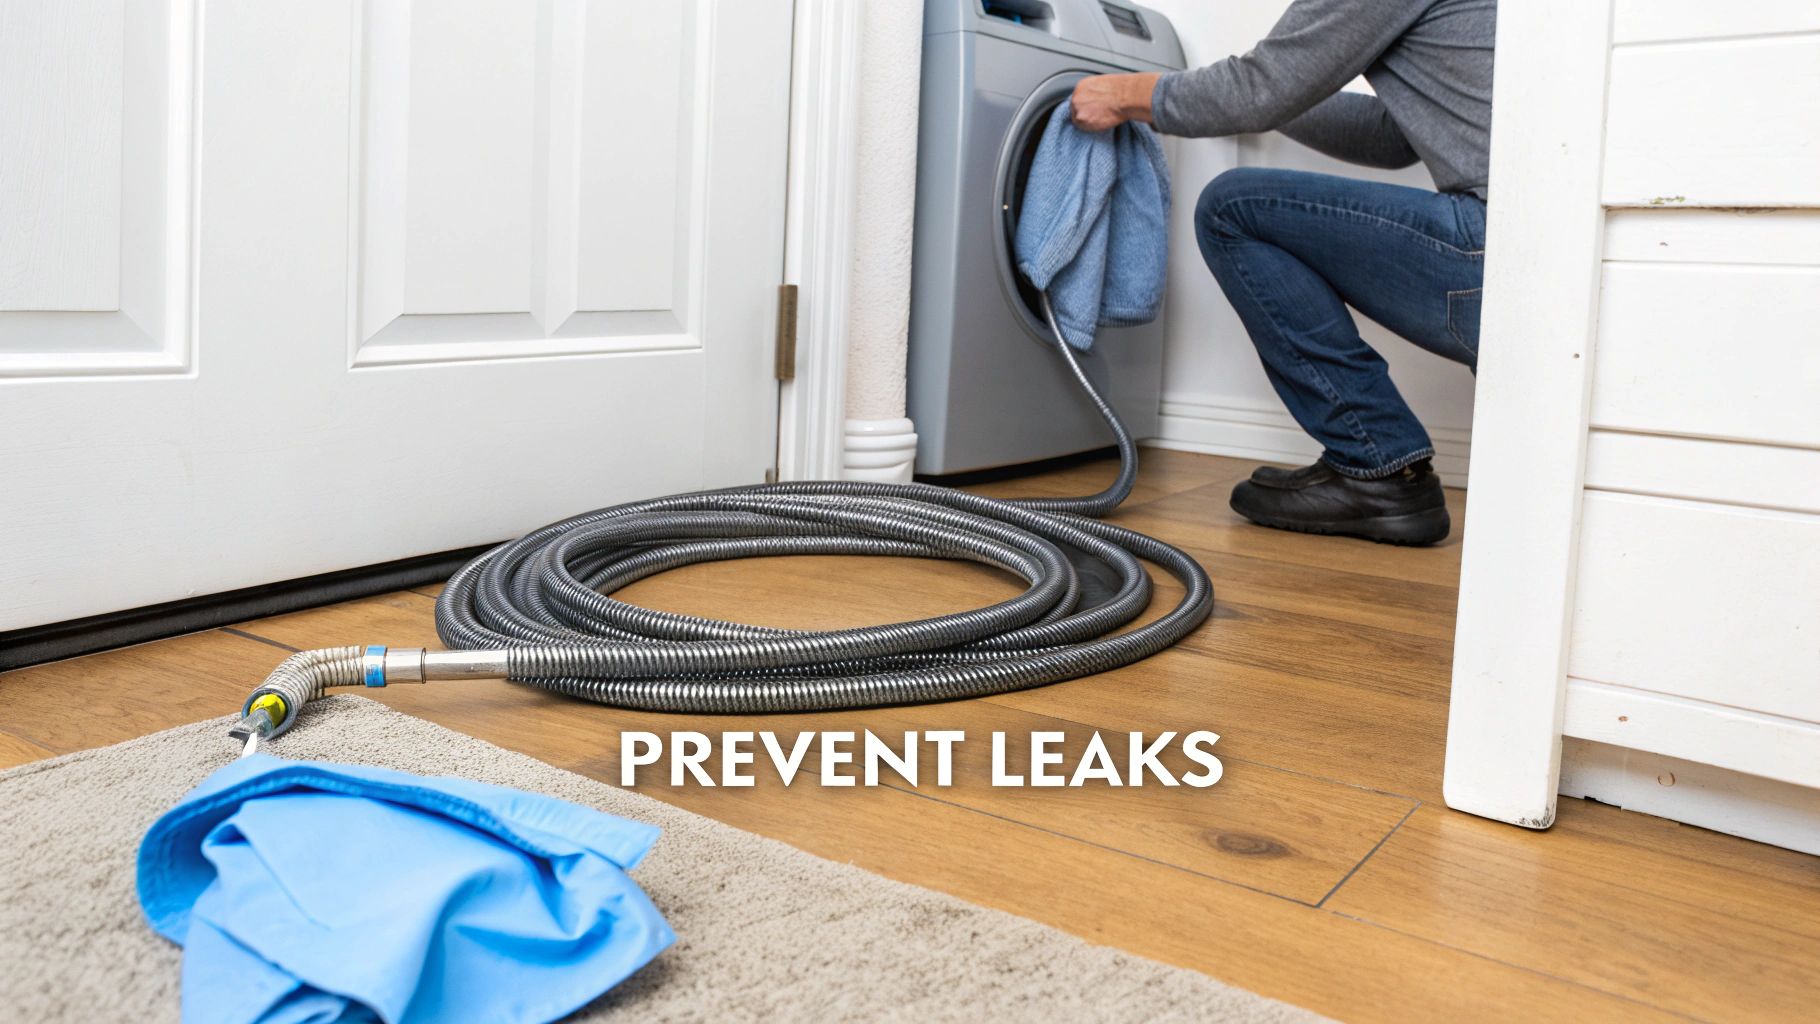
Start With the External Hoses
Nine times out of ten, the leak isn't coming from the washing machine itself, but from the hoses connected to it. These are by far the most frequent offenders and, thankfully, the easiest to check.
Gently pull your machine away from the wall so you have enough room to see what you're doing. A flashlight is your best friend here, even if the room is bright—it'll help you spot the tell-tale signs of a slow drip or old mineral deposits.
Inspecting the Water Supply Hoses:
- Check the Connections: Feel around the fittings where the two supply hoses (one hot, one cold) screw onto the wall taps and the back of the washer. A connection that's even slightly loose can cause a frustrating, persistent drip.
- Examine the Hoses Themselves: Look for any cracks, blisters, or bulges along the rubber. Over time, rubber breaks down and gets brittle, making it a prime candidate for a sudden split.
- Look for Corrosion: See any rust or white, chalky buildup around the metal fittings? That’s a clear sign of a long-term slow leak that needs to be addressed immediately.
Examine the Drain Hose and Connection
Next up is the drain hose. This is the hose that carries all the dirty water away from your machine, so a problem here can mean a lot of water on your floor, fast.
Check the entire length of the hose for splits or cracks. The most common failure point, however, is where it hooks into your home's standpipe or laundry sink. Make sure the hose is pushed in securely. Sometimes, the problem isn't the washer at all—a clog in your home's plumbing can cause water to back up and overflow, making it look like your machine is the culprit.
Pro Tip: If you only see water during the spin or drain cycle, the drain hose or a clogged household drain is almost certainly your problem. The pressure of the water being forced out will expose any weak spot in the hose or overwhelm a slow-moving drain.
Check the Front-Loader Door Seal
If you have a front-loading machine, that big rubber gasket around the door (we call it a door boot seal) is a prime suspect. It's designed to create a perfect seal, but it takes a lot of abuse.
Open the door and carefully inspect the entire gasket. Pay extra attention to the bottom, where water and gunk love to collect. Gently pull back the folds of the rubber and look for:
- Tears or Punctures: Even a tiny rip can let water seep out, especially while the drum is tumbling.
- Mould or Grime: A nasty buildup can prevent the door from sealing tightly. This can also cause some pretty unpleasant odours and health concerns. Learn more about why you should keep this clean in our guide on if washer door gasket mould is harmful.
- Warping or Brittleness: If the rubber feels stiff or has lost its flexibility, it's probably not making a watertight seal anymore.
Moving to Internal Components
If you’ve checked all the external spots and come up empty, the leak is likely coming from inside the machine's cabinet. This is where things get a bit more involved, but a careful look can still point you in the right direction.
Investigate the Drain Pump and Filter
The drain pump is the component that actively forces water out of the tub and into the drain hose. If the pump housing cracks or a seal fails, it can cause a pretty major leak, usually right from the bottom of the machine.
Most modern washers have a small access panel at the front-bottom for the drain pump filter. Before you open it, grab a shallow pan and a few old towels and place them underneath—there's always some water waiting to spill out. Carefully unscrew the filter cap and check for any debris. We find everything in these: coins, buttons, hairpins, and lint that can block the pump or even damage its seal. Another big clue is a loud grinding noise during the drain cycle; that's often the sound of a failing pump.
Deciding Between a DIY Fix and a Pro Repair
So you’ve found the source of the leak. Now you’re at a fork in the road: grab the tools and give it a shot yourself, or call in a professional? The right answer depends on the complexity of the job, your own comfort level with appliance repair, and what’s at stake if things go wrong.
Making the right call here is about more than just saving a few dollars. While a successful DIY fix is incredibly satisfying, a small mistake can turn a manageable drip into a full-blown flood. Suddenly, you’re not just paying for a washer repair—you’re dealing with water-damaged floors and drywall. It’s a real balance of confidence, cost, and consequence.
Gauging the Difficulty of Common Fixes
Not all leaks are created equal. Some fixes for a leaking washing machine are genuinely simple and require little more than common sense. Others, however, involve digging into the machine’s guts, where one wrong move can cause a much bigger headache.
Here’s a realistic look at some common repairs and how feasible they are for a DIY approach.
Beginner-Friendly DIY Fixes:
- Tightening Hose Connections: If you see water dripping from where the supply or drain hoses connect, a simple hand-tighten or a gentle nudge with pliers is often all you need. This is the easiest fix by a long shot.
- Replacing External Hoses: Swapping out a cracked or bulging supply hose is a straightforward job. You can pick up a set of high-quality braided steel hoses for $20-$40, and installation is as simple as unscrewing the old ones and screwing on the new ones.
Intermediate DIY Fixes (Proceed with Caution):
- Replacing a Front-Loader Door Gasket: This one looks easy on YouTube, but it can be deceptively tricky. You have to remove the old seal, carefully stretch the new one into place, and then wrestle with retaining springs or clamps to secure it. It takes a lot of patience and precision.
- Cleaning or Replacing the Drain Pump Filter: On most machines, the filter is easy to access through a small panel on the front. However, if the entire drain pump assembly needs replacing, the difficulty jumps up significantly.
A crucial part of any DIY project is knowing your limits. For a deeper look into the safety considerations, our article exploring if it is safe to repair your own appliances provides essential insights that can help you make an informed decision.
When a Professional Is the Smarter Choice
Some repairs look simple in a video but are a different story when you’re crouched on your laundry room floor. Internal jobs often require specialized tools, a solid understanding of your washer model’s design, and the experience to spot secondary issues you might miss. This is where a professional technician becomes an investment, not an expense.
It’s probably time to call a pro for these more involved jobs:
- Drain Pump Replacement: This requires disconnecting wiring, removing stubborn clamps and internal hoses, and usually tilting or laying the entire machine down. A mistake here can lead to electrical shorts or an even worse leak.
- Tub Seal or Bearing Replacement: This is one of the most complex washer repairs possible. It requires a near-total teardown of the appliance, including removing the heavy inner and outer drums. It’s extremely time-consuming and not a job for the faint of heart.
- Internal Hose Leaks: Just finding a cracked internal hose can be a challenge. Access is often tight, and you have to remove panels and other components in the correct order to get to it.
When faced with more complex issues or if you decide against a DIY approach, exploring professional maintenance and repairs services can provide the expertise needed to get the job done right the first time.
DIY vs Professional Repair Cost and Complexity
Before you start, it’s helpful to weigh the potential costs, time, and skills required for the repair you're facing. This table gives a quick overview to help you decide whether to DIY or call us.
| Repair Type | DIY Feasibility | Estimated Parts Cost | When to Call a Professional |
|---|---|---|---|
| Tighten/Replace Hoses | High (Beginner) | $20 – $40 for new hoses | If the leak persists after replacement. |
| Replace Door Seal | Medium (Intermediate) | $50 – $150 | If you're not confident stretching it or handling spring clamps. |
| Clean Pump Filter | High (Beginner) | $0 | If the pump itself is noisy, broken, or needs replacement. |
| Replace Drain Pump | Low (Advanced) | $40 – $100 | Always. Involves wiring, water, and tight spaces. |
| Replace Tub Seal/Bearings | Very Low (Expert) | $100 – $200+ | Always. This is a major teardown of the machine. |
Ultimately, the choice comes down to money and peace of mind. A DIY repair saves on labour costs, but you’re assuming all the risk. A professional repair from a company like Advance Appliance Ltd. includes the technician's expertise, the right parts, and a warranty on their work. If a DIY fix goes wrong, you could be on the hook for not just a new appliance, but also costly repairs to your floors and walls. A certified technician ensures the repair is done safely and correctly, protecting both your appliance and your home.
Simple Maintenance to Prevent Future Leaks
Honestly, the best way to handle a leaking washing machine is to make sure it never happens in the first place. I know, I know—proactive maintenance sounds like a chore. But spending just a few minutes every so often can save you from the absolute nightmare of water damage.
Think of it as a small investment that pays you back with peace of mind. These aren't complicated, technical jobs. Most of what I'm about to suggest takes only a few minutes and can easily become part of your regular routine. The real goal here is to spot the small stuff—like a bulging hose or a grimy door seal—before it becomes a catastrophic failure.
Establish a Regular Inspection Schedule
Consistency is everything. By just setting aside a few moments every couple of months to give your washer a quick look, you'll be miles ahead of most homeowners. You'll spot trouble when it's still small and easy to fix.
Here’s a simple checklist I give to all my clients:
- Check Hoses Monthly: Give the hot and cold water supply hoses a quick glance. Run your hand along their length—if you feel any soft spots, blisters, or bulges, that's a red flag for a future burst. Make sure the connections at the wall and the machine are tight and dry, too.
- Clean the Door Seal (Front-Loaders): This one is huge. After you’ve run your last load, just take a dry cloth and wipe down the rubber door gasket and the inside of the glass. It stops moisture from sitting there, which prevents mould, decay, and eventual leaks.
- Clear the Drain Pump Filter: Every 3-4 months, pop open that little door on the bottom front of your machine and clean out the drain pump filter. It's designed to catch coins, lint, and other gunk that could clog or break the pump.
A little bit of effort on a regular basis is so much less disruptive than an emergency cleanup. When you catch a deteriorating hose or a clogged filter early, you're not just preventing a leak—you're extending the life of your machine.
Smart Upgrades and Usage Habits
Beyond the routine checks, a couple of smart decisions can dramatically lower your risk of a leak. In my experience, one of the single best things you can do is upgrade your fill hoses. Those standard black rubber ones? They degrade over time and are probably the #1 cause of major washing machine floods I see.
Swap them out for braided stainless steel hoses. They're far more resistant to bursting and have a much longer lifespan. It’s a small cost for a massive upgrade in reliability.
How you use your machine also makes a big difference. Constantly overloading the drum puts a ton of strain on everything from the tub bearings to the seals and suspension. That stress eventually leads to mechanical failures and, you guessed it, major leaks. Stick to the manufacturer’s guidelines for load size. For more detailed advice, check out our 6 maintenance tips for your Whirlpool washing machine—many of these tips apply to all makes and models.
Knowing When to Call for Same-Day Service
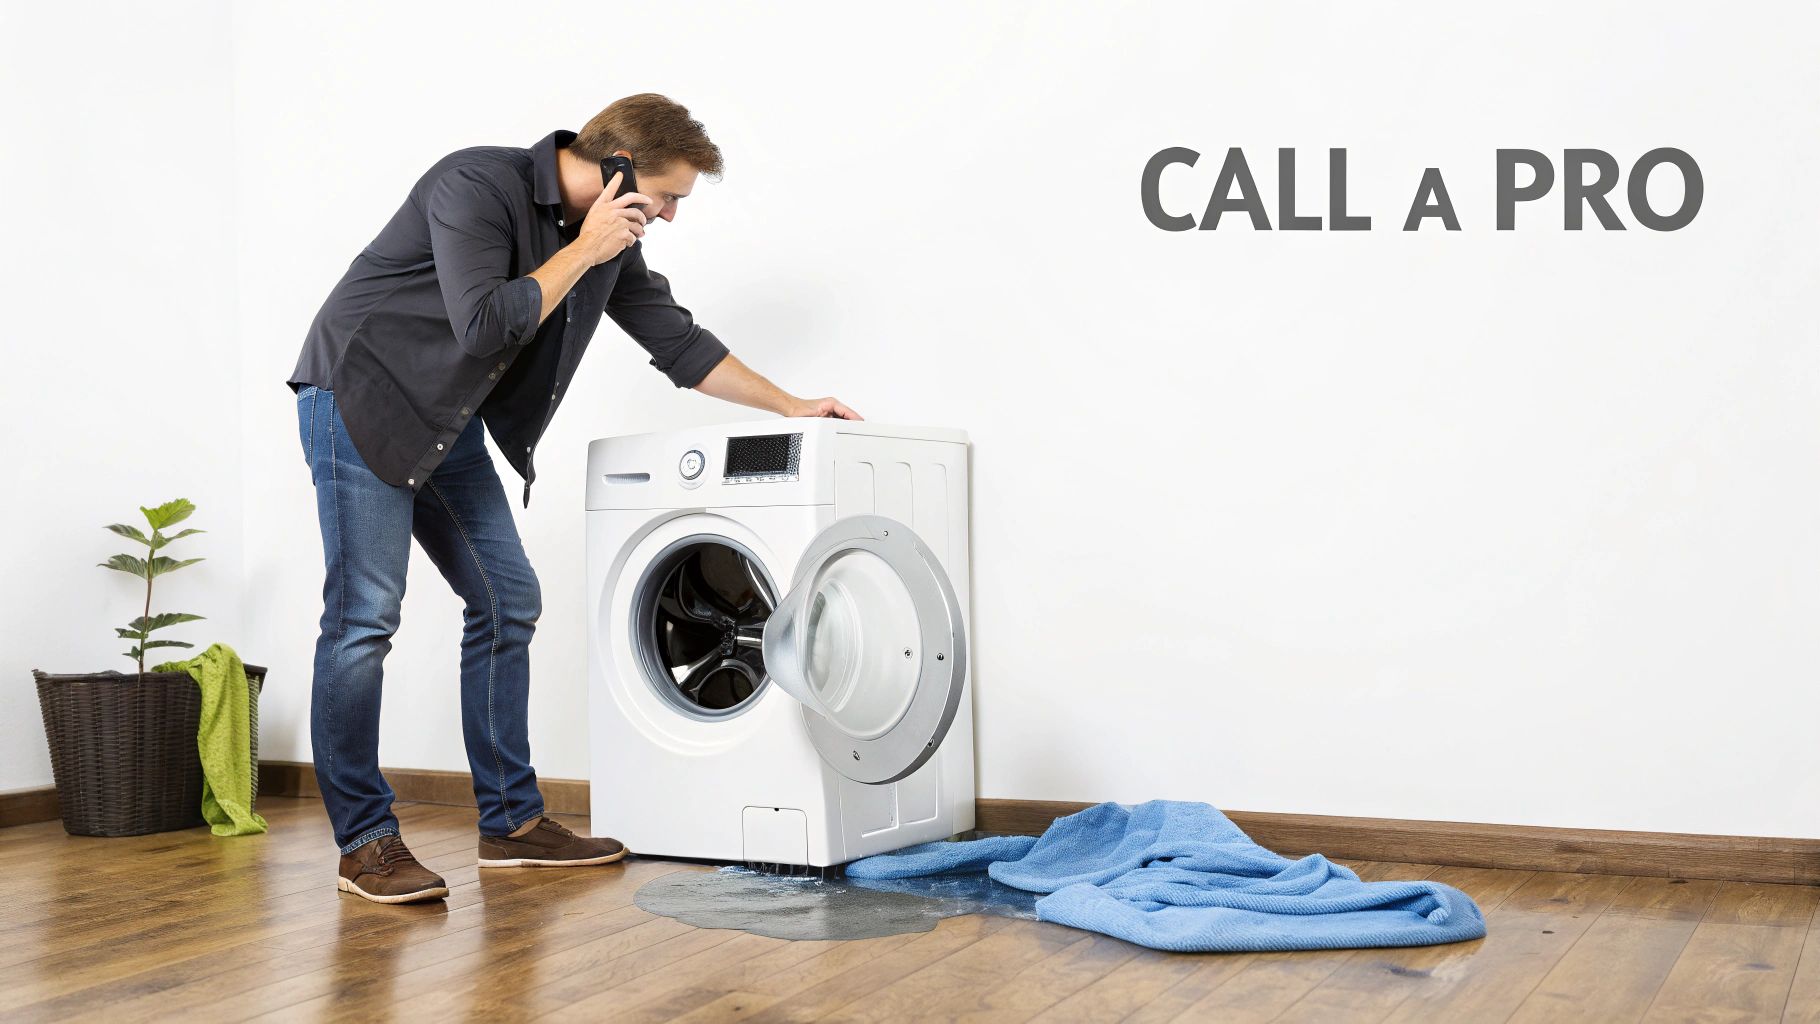
You've tried your best to troubleshoot, but some leaks are a clear sign to stop what you're doing and pick up the phone. While a DIY fix can be satisfying, certain red flags point to a problem that's either too complex or too dangerous to handle on your own. Honestly, knowing when to fold 'em is key to protecting yourself and preventing a small issue from turning into catastrophic home damage.
Making the call for professional help isn't admitting defeat; it's the smartest move you can make when the stakes are high. It's about safety first and making sure the repair is done right, for good.
Unmistakable Signs You Need an Expert
Some symptoms go way beyond a simple drip from a loose hose. These are the non-negotiable moments when you should get a professional on the line immediately.
- Strange Noises: Is the leak accompanied by loud grinding, banging, or screeching sounds? That often points to a serious mechanical failure, like a shattered drain pump or failing tub bearings. Continuing to run the machine could cause damage that’s beyond repair.
- Burning Smells: Any scent of burning rubber, plastic, or an electrical odour is an emergency. Full stop. This could mean a motor is overheating or there's a serious wiring issue. Unplug the machine right away and don’t touch it again until a technician gives the all-clear.
- Visible Sparks or Smoke: This is the most critical red flag of all. Water and electricity are a lethal mix. If you see sparks or smoke, you have an immediate electrical hazard on your hands.
The Problem with Uncontrollable Leaks
A small, manageable drip is one thing. A gushing, unstoppable flow of water is a whole different ball game. If you can't stop the water by turning off the supply valves behind the washer, you've got a major problem that needs a pro—fast.
This kind of severe leak can quickly overwhelm any cleanup effort, leading to thousands of dollars in damage to your flooring, subfloor, drywall, and personal belongings. If the leak escalates into a major flood or you suspect a plumbing issue, knowing how to find an emergency plumber is critical to minimize the damage while you wait for appliance service.
Your Reliable Solution: Advance Appliance Ltd.
When you're facing these stressful situations, you need a solution that's fast and reliable. At Advance Appliance Ltd., we get the urgency. That’s why we offer same-day and next-day service across Edmonton, Calgary, Red Deer, and all the surrounding communities. Our certified technicians are equipped to handle any emergency your leaking washing machine throws at you.
Choosing a certified professional isn't just about getting the repair done; it’s about peace of mind. Our licensed technicians guarantee a safe, correct fix that protects your appliance and your home from further harm, backed by a 90-day parts-and-labour warranty.
Don’t take chances with complex or dangerous repairs. For a deeper dive into what our pros handle, you can learn more about when to call an appliance repair technician in our detailed guide. When you need help now, our team is ready to get your appliance back in perfect working order.
Got Questions About Your Leaking Washing Machine?
Even after a bit of troubleshooting, it's normal to have some lingering questions. A leaking washer can be a tricky situation, and getting the right answers helps you make a smart call to prevent more damage and keep your home safe. Here are some quick, clear answers to the questions we hear most often from homeowners.
Why Is My Washer Leaking Only During the Spin Cycle?
This is a classic symptom. When a leak only appears during the spin cycle, the culprit is almost always something in the drainage system. Think about it: the high-speed spin forces a huge amount of water out of your clothes all at once.
If there's a tiny crack in the drain hose, a loose clamp where it connects to the machine, or even a partial clog further down the line, that sudden surge of water is enough to push through and make a puddle on your floor.
In some rarer cases, a worn-out tub seal or bearing could be to blame. These parts are under the most stress during the spin cycle, and if they fail, water can start to seep out from underneath the machine.
Can I Still Use My Washing Machine If It Has a Small Leak?
I'm going to be blunt: please don't. It's incredibly tempting to just throw a towel down and run one more load, but water and electricity are a dangerous mix. Operating an appliance that's actively leaking is a serious safety risk.
Beyond the immediate danger, even a "small" drip is a sign of bigger trouble. That slow leak can silently rot your floorboards, damage the subfloor, and feed a hidden mould problem inside your walls. It's much better to see a small leak as an early warning that a part is about to fail completely, which could lead to a much bigger flood. The best move is always to stop using it and get the problem sorted out.
Is It Worth Repairing an Old Leaking Washing Machine?
This is the big question, and it really comes down to a bit of math and common sense. A great rule of thumb we use in the field is the "50% rule." If the repair is going to cost more than half the price of a brand-new, comparable washer, it usually makes more sense to replace it.
You also have to consider its age and history. Is your washer over eight years old? Has it been acting up and needing other fixes? If so, putting more money into it might not be the best long-term investment. A new, more energy-efficient model could save you more down the road.
But if the leak is from something simple and cheap to fix, like a worn hose or a loose connection, a repair is almost always the smarter, more economical choice.
Household leaks are a major source of water loss, with the average U.S. household wasting nearly 10,000 gallons annually. A leaking washing machine contributes significantly to this waste, which is a critical concern in water-conscious regions. Promptly fixing even a small leak not only prevents damage but also aligns with important conservation efforts. You can learn more about water usage and conservation from the EPA's official statistics and facts.
No matter what’s causing the leak, you don’t have to figure it out on your own. If you’re dealing with a leak you can’t track down, or you just want the peace of mind of a professional repair, give Advance Appliance Ltd. a call. Our certified technicians offer same-day and next-day service to get your home back to normal, fast.
Book your repair online with Advance Appliance Ltd. today and let us handle the rest.