When you swing open the fridge door expecting that familiar rush of cold air, but instead get hit with a wave of lukewarm disappointment, don't panic. The fix for a refrigerator that's stopped cooling is often surprisingly simple. In many cases, it comes down to three things: making sure it's plugged in securely, checking that the thermostat wasn't accidentally turned down, and clearing away any groceries that might be blocking the air vents inside. You’d be surprised how often one of these quick checks gets things back on track.
Your First Diagnostic Checks for a Warm Fridge
That sinking feeling when you realise your fridge is warm is something no homeowner wants to experience. But before you jump to conclusions about expensive repairs, a few simple checks can often pinpoint and solve the issue in minutes. This is your first line of defence—a quick triage process that moves from the absolute basics to slightly more involved inspections that don't require any tools.
Start With the Obvious: Power and Settings
It sounds almost too basic to mention, but you'd be amazed how many times a cooling problem is just a power interruption. A plug can get bumped loose during cleaning, or a breaker could have tripped in your home's electrical panel. If the interior light is also out, that's a dead giveaway.
Next, take a close look at the thermostat dial or digital display. It's incredibly common for these to get knocked or adjusted by accident, especially when loading a big grocery haul or by curious kids. Make sure it’s set to the manufacturer's recommended temperature, which is usually around 4°C (40°F).
If the setting looks right but you don't hear any humming, buzzing, or fan noises, it could point back to an electrical problem. If you're hearing unusual sounds, our guide on refrigerator normal sounds and noises can help you figure out what they mean.
This quick diagram walks you through that initial troubleshooting flow.
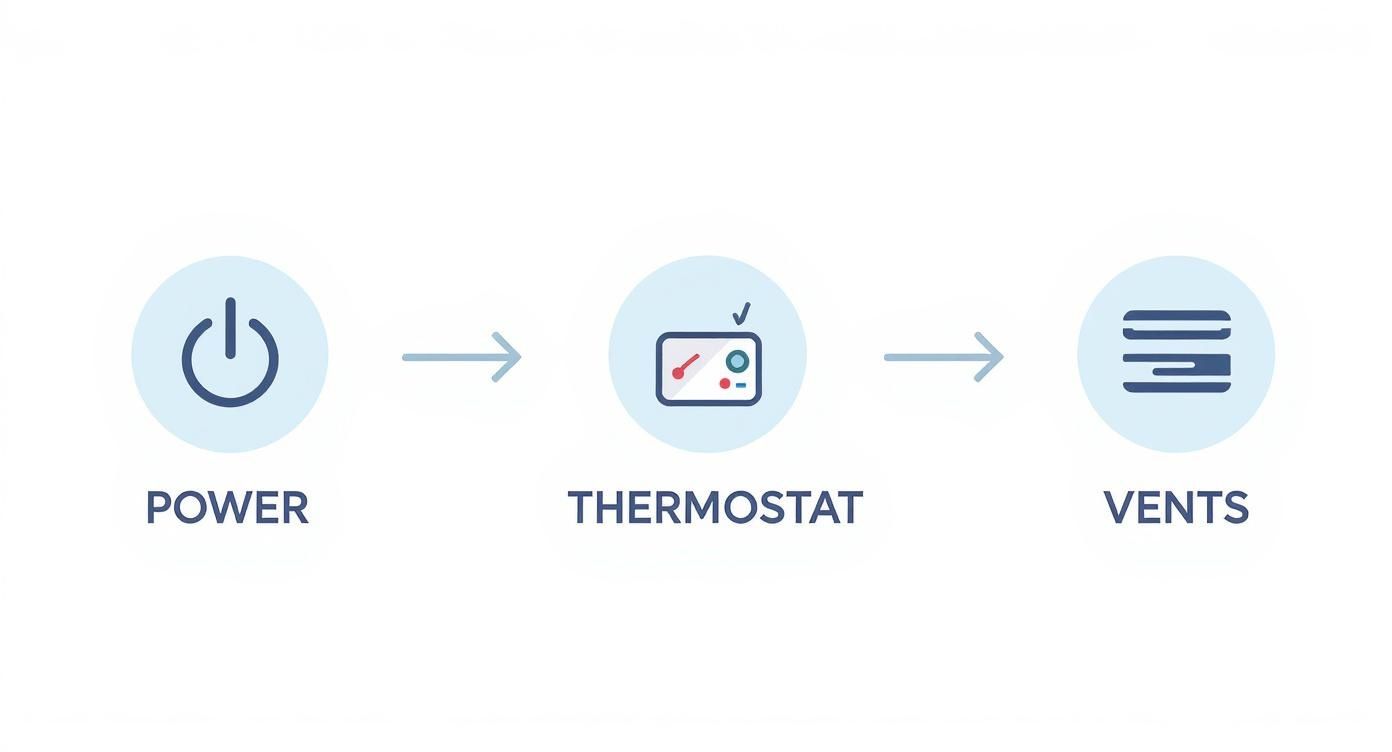
Following this logical path—power, settings, then airflow—is the best way to start before you dive into checking mechanical parts.
To make it even easier, here's a quick checklist to run through.
Quick Diagnostic Checklist for a Refrigerator Not Cooling
| Symptom | Potential Cause | Quick DIY Fix |
|---|---|---|
| No lights or sounds | Power loss | Check if the plug is secure and test the outlet. Check your home's circuit breaker. |
| Fridge feels slightly cool, but not cold | Incorrect thermostat setting | Adjust the thermostat dial or digital control to the recommended setting (4°C). |
| Uneven cooling; some items are cold, others are warm | Blocked air vents | Rearrange groceries to ensure there is clear space around all interior vents. |
These simple steps cover the most common culprits we see on service calls.
Confirm Air Can Circulate Freely
Even a perfectly functioning refrigerator can't do its job if the cold air can't get where it needs to go. Modern fridges depend on a system of vents to push cold air from the freezer into the main food compartment. If these are blocked, you'll get warm spots.
Pro Tip: Over-packing is one of the biggest enemies of proper cooling. When you cram every shelf and drawer to its absolute limit, you're unintentionally blocking the very vents that keep everything chilled. A bag of lettuce or a carton of milk pushed right up against the back wall is a classic offender.
Take a minute to shuffle things around inside. You should be able to see a clear path around the vents, which are typically found along the back or side interior walls. This one small adjustment can dramatically improve cooling efficiency and might just solve your problem instantly.
By ruling out these simple causes first, you can move on to checking specific components with a lot more confidence.
Gathering Your Tools and Safety Essentials

Before you start pulling panels off your fridge, let’s talk prep. It’s tempting to just jump in, but trust me, getting your gear and safety sorted out first is the smartest move you can make. Trying to fix a refrigerator that’s not cooling without the right equipment can quickly turn a simple job into a frustrating—and potentially dangerous—ordeal.
First things first: power. And I don’t mean just turning the dial to "off." You absolutely must unplug the refrigerator from the wall outlet. This is non-negotiable. It completely removes the risk of electric shock when you start poking around components like fans, capacitors, and relays.
Gear Up for Safety
Even with the power disconnected, a little personal protection goes a long way. The back of a fridge is full of sharp metal edges, so a decent pair of work gloves will save your hands from getting sliced up.
I’d also grab a pair of safety glasses. When you’re cleaning condenser coils or working near the fans, you’ll be dislodging a lot of dust and grime. The last thing you want is that stuff flying into your eyes. It's a simple step, but a crucial one.
Building Your DIY Repair Kit
You don’t need an entire workshop to tackle the most common cooling problems. A handful of specific tools will get you through most diagnostic checks and basic part swaps. Here’s what I recommend having on hand:
- Multimeter: This is your best friend for electrical diagnostics. It’s the only way to know for sure if a component like a fan motor or defrost heater has burned out.
- Nut Driver Set: Most of the panels and components inside a fridge are held on by hex-head screws. A 1/4-inch and 5/16-inch nut driver will fit almost everything you encounter.
- Screwdrivers: Just a basic set with a few Phillips and flat-head options will do the trick for the other odds and ends.
- Condenser Coil Brush: This isn’t just a regular brush. It’s long and flexible, designed to get deep into the coils and pull out all the lint and pet hair that’s choking your fridge’s airflow. A vacuum with a brush attachment is the perfect partner for this job.
- Putty Knife: A flexible one is perfect for gently prying off plastic covers and panels without cracking them.
Getting all this stuff together before you begin makes the whole process smoother. You won't have to stop what you're doing to go searching for the right tool, which keeps the frustration levels down and lets you focus on the fix.
With your safety gear on and your tools ready, you’re set to dig a little deeper than the basic checks. This organized approach is the key to successfully figuring out why your fridge has stopped cooling and getting it back to work.
Inspecting Key Cooling System Components

Alright, with the basic power checks out of the way, it's time to roll up our sleeves and look at the parts that do the heavy lifting for cooling. This is where most mechanical problems tend to hide. We'll start with the most common culprit by a long shot: dirty condenser coils.
Think of these coils as your fridge's radiator. Their job is to release heat from inside the unit out into your kitchen. When they get clogged, the whole system chokes. It’s like trying to run a marathon while breathing through a straw—that's what a thick blanket of dust and pet hair does to your fridge.
Locate and Clean the Condenser Coils
First things first, you need to find these coils. On most newer fridges, they're hiding at the bottom, tucked behind a toe-grill or a back access panel. Once you've unplugged the appliance, grab your nut driver and pop that panel off.
Don't be surprised by what you find. It's usually a mess of dust bunnies, lint, and pet fur. This gunk acts as an insulator, trapping heat and forcing the compressor to work way harder than it should. This doesn't just drive up your power bill; it’s a leading cause of expensive component failures down the road.
Grab your coil brush and a vacuum with a hose attachment, and gently clear all that debris away. Take your time and get as far back as you can. When you're done, the metal coils should be clean and visible. Honestly, this one simple step fixes a surprising number of cooling issues.
Check the Condenser and Evaporator Fans
Your fridge uses two essential fans to keep air moving. If either one stops spinning, the cooling process grinds to a halt.
- The Condenser Fan: This fan sits near the compressor and coils, blowing air across them to help dissipate heat. If it fails, the compressor can overheat, and the system can’t cool the refrigerant effectively.
- The Evaporator Fan: You'll find this one inside the freezer, usually behind a panel. It's responsible for circulating that frosty air from the evaporator coils into both the freezer and the fresh food compartment.
The easiest initial test? Just listen. When the compressor is running, you should hear both fans whirring. If you hear the compressor humming but one of the fans is silent, you've got a major clue.
With the power off, give the fan blades a spin by hand. Do they move freely? If they’re stiff or something is blocking them, you may have found your problem. It's not uncommon for a stray bit of ice or packaging to jam the evaporator fan. If nothing is blocking it and it still won't run, the motor has probably burned out and needs to be replaced.
Industry data shows just how common these issues are. Dirty condenser coils are behind roughly 35% of cooling-related service calls, while faulty evaporator fans account for another 20%. Together, they're the source of over half of all cooling failures.
Test the Thermostat for Proper Function
The thermostat is the brain of the operation, telling the compressor when to kick on and off to maintain the right temperature. If it goes bad, it might never send the "start cooling" signal, leaving you with a warm fridge.
Here's a quick check: turn the thermostat dial to its coldest setting. You should hear a faint "click" as it engages, and the compressor and fans should start up shortly after. If you hear that click but nothing happens, the thermostat is likely fine, but another part is failing to respond.
No click at all? The thermostat itself is probably the issue. For a definitive answer, you'd need a multimeter to test for continuity, which confirms if the electrical contacts inside are still working.
If all these components seem to be working properly, the problem might be deeper in the system. More advanced steps involve checking the refrigerator compressor, but before you go there, always start with the coils and fans—they're the most frequent and easily fixable offenders.
Diving Deeper: Mechanical and Defrost System Checks

Alright, you've cleaned the condenser coils and made sure the fans are spinning, but the fridge is still warm. Now we’re getting into the nitty-gritty. This is where we move past the basic maintenance fixes and start looking at the specialized parts that can bring a fridge to its knees.
If you're comfortable using a multimeter and getting hands-on with the fridge’s core components, this section is for you. We’re going to zero in on two of the most common culprits: the compressor start relay and the entire defrost system. When either of these fails, the cooling process grinds to a halt. With a little patience, you can figure out which one is causing your headache.
The Mighty Little Start Relay
Think of the compressor as the heart of your refrigerator. Well, the start relay is the spark that gets that heart pumping. It’s a small, unassuming part that delivers the electrical kick needed to get the compressor going. When it fails, you’ll often hear a telltale sound: the compressor clicks on, hums for a moment, then clicks right back off without ever starting its cooling cycle.
You'll find the start relay mounted on the side of the compressor, tucked away at the back of your fridge. It’s a small plastic box with a few wires connected to it. After unplugging the fridge, you can usually pull it straight off the compressor's terminals.
An easy first check? Give it a little shake. If you hear a rattle, that’s a dead giveaway. The insides have likely burned out and broken apart. To be absolutely sure, you can test for continuity with your multimeter set to a low ohms setting. The exact terminals to test will vary by model, but a quick search for your relay type will show you what to look for.
The good news is that replacing a start relay is typically a fast and affordable fix—a very satisfying repair for any DIYer.
The Mystery of the Defrost System
Ever opened your fridge to find it's warm, but the freezer is still an arctic tundra? That’s the classic sign of a defrost system failure. Your "frost-free" refrigerator isn't magic; it still creates frost, but it does it on evaporator coils hidden behind a panel inside your freezer.
A healthy defrost system periodically heats up to melt this frost, ensuring air can flow freely. When the system breaks down, ice builds up on those coils until it forms a solid block, eventually choking the vent that sends cold air into the refrigerator compartment.
A faulty defrost system is one of the top reasons people call us. The system has three key players: a defrost timer, a defrost heater, and a defrost thermostat. If any single one of them fails, the whole show stops.
To get a look, you’ll need to empty your freezer and remove the interior back panel. If you’re greeted by evaporator coils completely encased in ice, you’ve found your problem. You can use a hairdryer on a low setting to manually defrost the coils (be careful not to melt any plastic!) to get things working temporarily. But be warned: that ice will come right back unless you fix the broken part.
Testing the Defrost Components
Once the ice is gone and the fridge is unplugged, you can use your multimeter to test each component for continuity.
- Defrost Heater: This is usually a glass tube or element found at the bottom of the coils. If a continuity test shows it's open, the element has burned out.
- Defrost Thermostat: This small, round device is clipped directly onto the coils. It must be cold to test properly. If it shows no continuity while it's still frosty, it needs to be replaced.
The defrost timer (on older models) or the main control board (on newer ones) is the brain of the operation. A bad timer can get stuck and simply never tell the heater to turn on. If you suspect a defrost issue, our guide on why your fridge is not defrosting offers a more detailed walkthrough.
These deeper mechanical problems aren't just hypotheticals; they're incredibly common. Faulty compressors and their related parts, like start relays, along with defrost system failures, account for over 60% of refrigerator repair calls in some major cities.
Successfully diagnosing a bad start relay or a failed defrost heater can save you a bundle on a service call. More importantly, it gets your fridge back to doing its job: keeping your food fresh.
Knowing When to Call a Professional Repair Service
There's a real satisfaction in fixing something yourself, and I get that. You've gone through the steps, checked the fans, cleaned the coils, maybe even tested the start relay. But if your fridge is still just a cold closet, you might have hit the wall where DIY enthusiasm meets real-world complexity. This is the point where specialized training, expensive gear, and some serious safety risks come into play.
Knowing your limits is the most important part of any repair. Pushing forward when you're out of your depth can turn a fixable problem into a catastrophic failure. You could damage the appliance beyond repair or, worse, create a real safety hazard in your home.
Definitive Signs You Need a Professional
Some symptoms are a dead giveaway that the problem is bigger than a simple part swap. If you see or hear any of these, it’s time to put the tools down and pick up the phone.
- A Clicking or Humming Compressor: You hear it try to kick on—that classic click, followed by a low hum, then another click as it gives up. If you've already confirmed the start relay is good, this almost always points to a failing or seized compressor. That's the heart of your refrigerator's cooling system, and it's not a simple fix.
- An Oily Residue or Chemical Smell: Finding a black, oily puddle on the floor behind the fridge or catching a faint chemical odour is a huge red flag. This is a tell-tale sign of a refrigerant leak from the sealed system.
- Complex Electrical Faults: Is the digital display acting possessed? Are multiple, unrelated parts of the fridge failing at once? This usually points to a fault in the main electronic control board. Diagnosing and replacing these sensitive boards is a job for an expert.
A sealed refrigerant system is off-limits for a reason. In Canada, handling refrigerants is legally restricted to certified technicians. The system is under high pressure, and the chemicals are hazardous. Trying to "recharge" it yourself isn't just a bad idea—it's illegal and dangerous.
The Sealed System Is a No-Go Zone
The single most important line you can't cross as a DIYer is the sealed refrigerant system. This is the network of tubing that holds the refrigerant gas, and it’s the magic that makes your fridge cold. For both legal and safety reasons, any work on this system—fixing leaks, recharging refrigerant, or replacing the compressor—absolutely must be done by a licensed professional.
There’s no such thing as a safe or effective "DIY refrigerant kit." If you suspect a leak, the only real solution is to call for service. A professional from Advance Appliance Ltd. has the certification, vacuum pumps, and specialized gauges required to handle these chemicals safely and repair the system correctly.
To help you decide on your next move, here's a quick breakdown of when to tackle it yourself versus when to call us in.
DIY Fix vs Professional Repair
| Symptom | Recommended Action | Reasoning |
|---|---|---|
| Simple Power Issue | DIY Fix | Usually a tripped breaker or a faulty outlet. It's a low-risk first step. |
| Dirty Condenser Coils | DIY Fix | Routine maintenance that anyone can do with a brush and vacuum. |
| Bad Fan Motor | DIY/Professional | If you're comfortable with basic electrical work, it's doable. Otherwise, call a pro. |
| Faulty Start Relay | DIY Fix | It's a plug-and-play part that's relatively easy and cheap to replace. |
| Compressor Clicking/Humming | Call a Professional | This points to a major component failure requiring specialized tools and training. |
| Refrigerant Leak | Call a Professional | Non-negotiable. This is a hazardous materials issue that requires certification. |
| Icing in Freezer | DIY/Professional | Could be a simple defrost timer (DIY-friendly) or a complex sealed system issue. |
Deciding whether to sink money into a major repair or just buy a new fridge can also be a tough call. For a deeper dive, our article exploring if it's cheaper to repair or replace a refrigerator offers some great insights to help you make the best financial choice.
Ultimately, calling a professional isn't giving up; it’s making a smart, safe decision. For complex issues in Edmonton, Calgary, or Red Deer, our certified technicians can provide same-day or next-day service to get the job done right, saving you from the risk and frustration of a repair gone wrong.
Common Questions About Refrigerator Cooling Problems
When your fridge gives up the ghost, a dozen questions immediately pop into your head. How much is this going to set me back? Can I fix it myself? And why on earth is the freezer still working? We hear these all the time from homeowners across Edmonton and Calgary, so let's tackle the most common ones right now.
Why Is My Freezer Cold But the Refrigerator Is Warm?
This is, without a doubt, the number one scenario we encounter. It almost always comes down to an airflow problem. See, all the cold air is actually generated in your freezer. A fan is then supposed to blow that chilled air into the refrigerator section through a series of vents.
When that transfer gets blocked, the fridge heats up while the freezer stays perfectly frosty. Two main culprits are usually to blame:
- A Failed Evaporator Fan: This is the little fan responsible for moving the cold air. If its motor burns out and it stops spinning, the cold air is trapped in the freezer with nowhere to go.
- A Faulty Defrost System: Your fridge is designed to automatically melt any ice buildup on its internal coils. If the defrost heater or timer fails, that ice just keeps growing until it forms a solid block, literally plugging up the air vents. A thick, snowy sheet of frost on the freezer's back wall is the classic tell-tale sign.
What Is the Average Cost for a Refrigerator Cooling Repair?
Repair costs really run the gamut, depending on the broken part, the brand of your fridge, and local labour rates. A simple DIY job, like swapping out a bad start relay, might only cost you under $50 for the part. Easy peasy.
Once you call in a pro, the numbers change. A typical repair for a failed fan motor or a defrost system issue usually lands somewhere between $200 and $450. The really expensive jobs involve the sealed system—things like a compressor replacement or patching a refrigerant leak. Those can easily climb from $500 to over $1,000. At that point, you have to seriously consider if it's worth fixing an older unit versus just buying a new one.
Key Takeaway: The cost to fix a refrigerator not cooling depends entirely on the failed component. Simple electrical parts are affordable, but repairs involving the sealed refrigerant system are significantly more expensive and always require a certified technician.
Can I Add More Freon to My Refrigerator Myself?
Let's make this crystal clear: absolutely not. First off, "Freon" is just a brand name for a refrigerant, and your fridge’s cooling system is a closed loop. If it's low on refrigerant, it means there’s a leak somewhere. Topping it up is like putting air in a tire with a hole in it—it doesn't fix the actual problem.
More importantly, handling refrigerants is legally restricted in Canada to certified technicians. This is due to the environmental hazards and the very specialized equipment needed to do the job safely. Trying a DIY recharge is not only dangerous and illegal, but it's also completely ineffective. If you think you have a refrigerant leak, the only right and safe move is to call a professional.
How Can I Prevent Future Refrigerator Breakdowns?
A little proactive care goes a long way. The single best thing you can do is clean the condenser coils once or twice a year. Dust, pet hair, and dirt build up on them and act like an insulating blanket, forcing the compressor to overheat and work itself to death.
Beyond that, a few good habits can make a real difference:
- Check Your Door Seals: Run your hand along the rubber door gaskets every so often. If you feel any cold air escaping, they aren't sealing properly, making the fridge run non-stop.
- Give It Room to Breathe: Don't shove your refrigerator right up against the wall. It needs a few inches of space at the back and sides to get rid of heat effectively.
- Don't Over-Pack It: Cramming every last inch of the fridge blocks the internal air vents. Cold air needs to circulate freely to keep everything at the right temperature.
For true peace of mind, it's worth understanding the benefits of preventive maintenance as a regular part of your home care routine. These simple actions are the best way to avoid the headache of a warm fridge when you least expect it.
If you’ve worked through these questions and your fridge is still on the fritz, it's time to bring in the experts. For reliable, same-day service in Edmonton, Calgary, Red Deer, and the surrounding areas, trust the certified technicians at Advance Appliance Ltd. We have the tools and know-how to diagnose the issue and fix it right the first time. Book your service online at https://advanceappliance.ca and get your kitchen back to normal.