It’s a classic laundry room headache: you start a load of wet clothes, and later find the gas dryer stopped mid-cycle, long before the job was done. The good news is, this usually isn’t a sign of a catastrophic failure. More often than not, it’s a safety feature doing its job.
Your dryer is designed to shut down when it detects a problem, most commonly overheating from poor airflow. It can also be triggered by a faulty sensor or an electrical issue.
Why Does My Gas Dryer Keep Shutting Off?
It’s not just stubbornness when your gas dryer won’t finish a cycle. It is an innate reaction to an indication that something is amiss—a self-defense mechanism to avert more serious issues.
This is a frequent problem that rarely indicates your dryer is completely malfunctioning. Rather, the cycle is being broken by a particular element or circumstance. To avoid two significant risks, the machine shuts down:
- Fire Hazard: A dryer that overheats from a blocked vent is a serious fire risk. The automatic shutdown is a critical safety function.
- Component Damage: If the dryer kept running under faulty conditions, it could burn out expensive parts like the main control board or the motor.
The Diagnostic Starting Point
A first evaluation will help you determine whether you’re dealing with a straightforward obstruction you can resolve on your own or something that requires professional attention before you call a specialist.
This will assist you in reducing the number of options. Simply match the likely culprit to the behavior of your dryer.
Quick Diagnostic Checklist for a Dryer Stopping Mid-Cycle
| Symptom | Likely Cause | DIY Difficulty | Next Step |
|---|---|---|---|
| Dryer stops, clothes are hot, cabinet is hot | Airflow blockage (vent, filter) | Easy | Check and clean the entire vent path. |
| Dryer stops, no heat at all | Faulty flame sensor or igniter | Medium | Test the flame sensor and igniter for continuity. |
| Dryer stops at random times, heat is okay | Faulty cycling thermostat | Medium | Test the thermostat for proper operation. |
| Dryer stops, won't restart for a while | Overheating motor | Hard | Check motor for debris and ensure it can spin freely. |
| Dryer timer doesn't advance, stops | Faulty timer or control board | Hard | Test timer motor or check control board for errors. |
This checklist gives you a solid starting point. Now, let’s dig deeper into what these symptoms mean. This decision tree chart helps visualize the two main paths your diagnosis will likely follow.
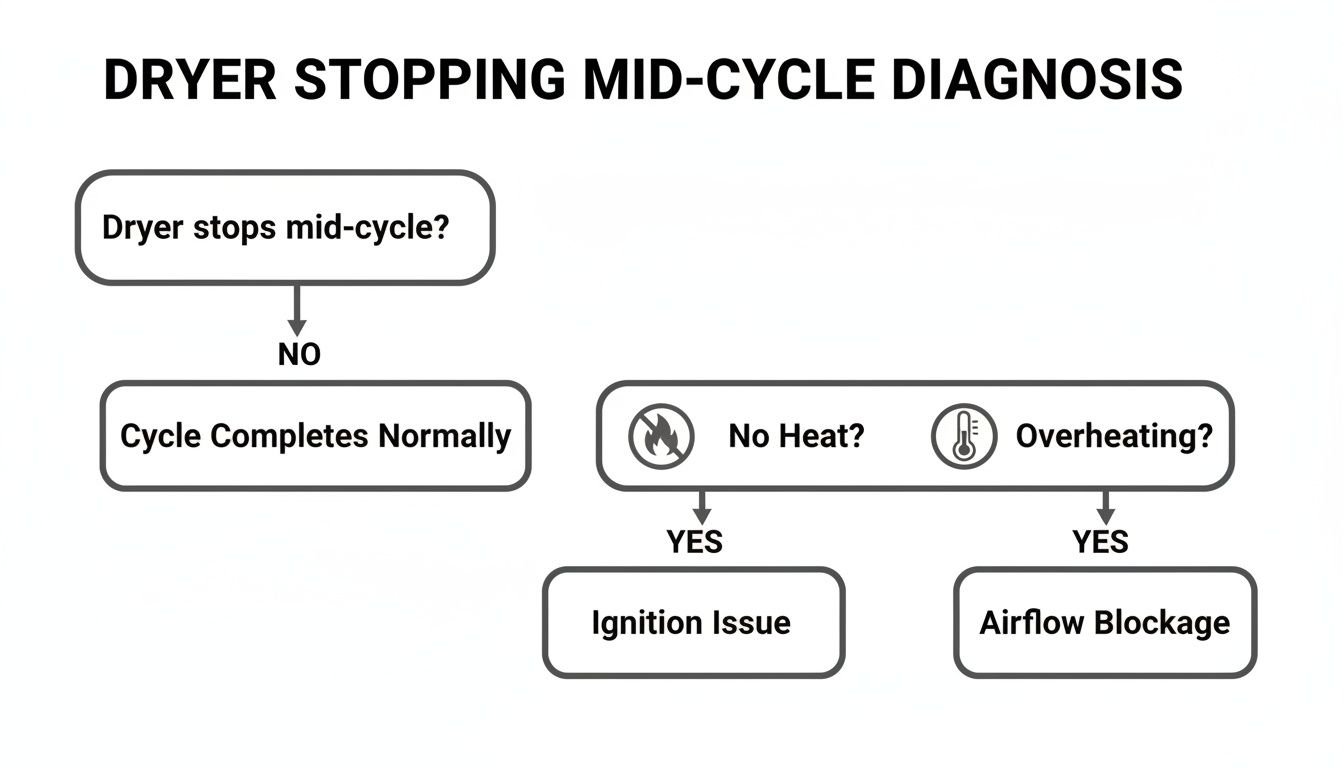
As you can see, the problem usually falls into one of two categories: either there’s no heat to begin with (pointing to an ignition issue), or the dryer is overheating (almost always an airflow problem). The troubleshooting steps can also vary based on your appliance, which is why it helps to understand the key differences between electric and gas dryers.
Key Takeaway: A gas dryer that quits mid-cycle is usually protecting itself. The most common culprit is overheating caused by restricted airflow—a problem that’s not only fixable but also critical to address for your home’s safety.
Checking for Blocked Vents and Airflow Problems
Before worrying about a complex repair, let’s look at the number one reason a gas dryer stops mid-cycle: a blocked vent. Many service calls for “broken” dryers boil down to a simple—but dangerous—lint clog.
Your dryer tumbles clothes in hot air and pushes that humid air outside. If the air can’t get out, the temperature inside the drum skyrockets. This trips a safety device, like a high-limit thermostat, which shuts the whole thing down to prevent a fire. It’s not a fault; it’s the machine protecting itself.
So, let’s walk through the entire ventilation path to find the blockage. Most of the time, this is all it takes to solve the problem.
The Four Key Checkpoints for Airflow
Think of your dryer’s vent system as having four critical spots where a clog can happen. A blockage in any one of these will back everything up and shut your dryer down.
- The Lint Screen: Your first line of defense, but it’s not foolproof.
- The Lint Screen Housing: The slot where the screen sits is a notorious lint trap.
- The Dryer Vent Duct: The tube running from the dryer to the wall. This is a big one.
- The Exterior Vent Cap: The final exit point on the outside of your house.
Working through these four spots will fix the vast majority of airflow-related shutdowns.
Inspecting and Cleaning the Lint Screen and Housing
There’s more to this than simply scraping off the fluff, even though it seems obvious. Dryer sheets and liquid fabric softener cause an invisible film to accumulate on the mesh screen over time. Even when the screen seems clean, this layer obstructs airflow by clogging its pores.
Take out the screen and run it under a tap for a brief test. The mesh is blocked if water collects or beads on it rather than passing through. Use hot water, dish soap, and a soft brush to gently scrub it. Before replacing it, thoroughly rinse it and allow it to air dry.
Next, look inside the cavity where the lint screen slides in. You’ll be amazed at how much lint bypasses the filter and gets stuck there.
Safety First: Before going any further, unplug the dryer from the wall and shut off the gas supply valve. This is essential for your safety.
Grab a vacuum with a long, skinny attachment or a dedicated dryer vent cleaning brush. Reach down into the housing and clear out all the lint you can find.
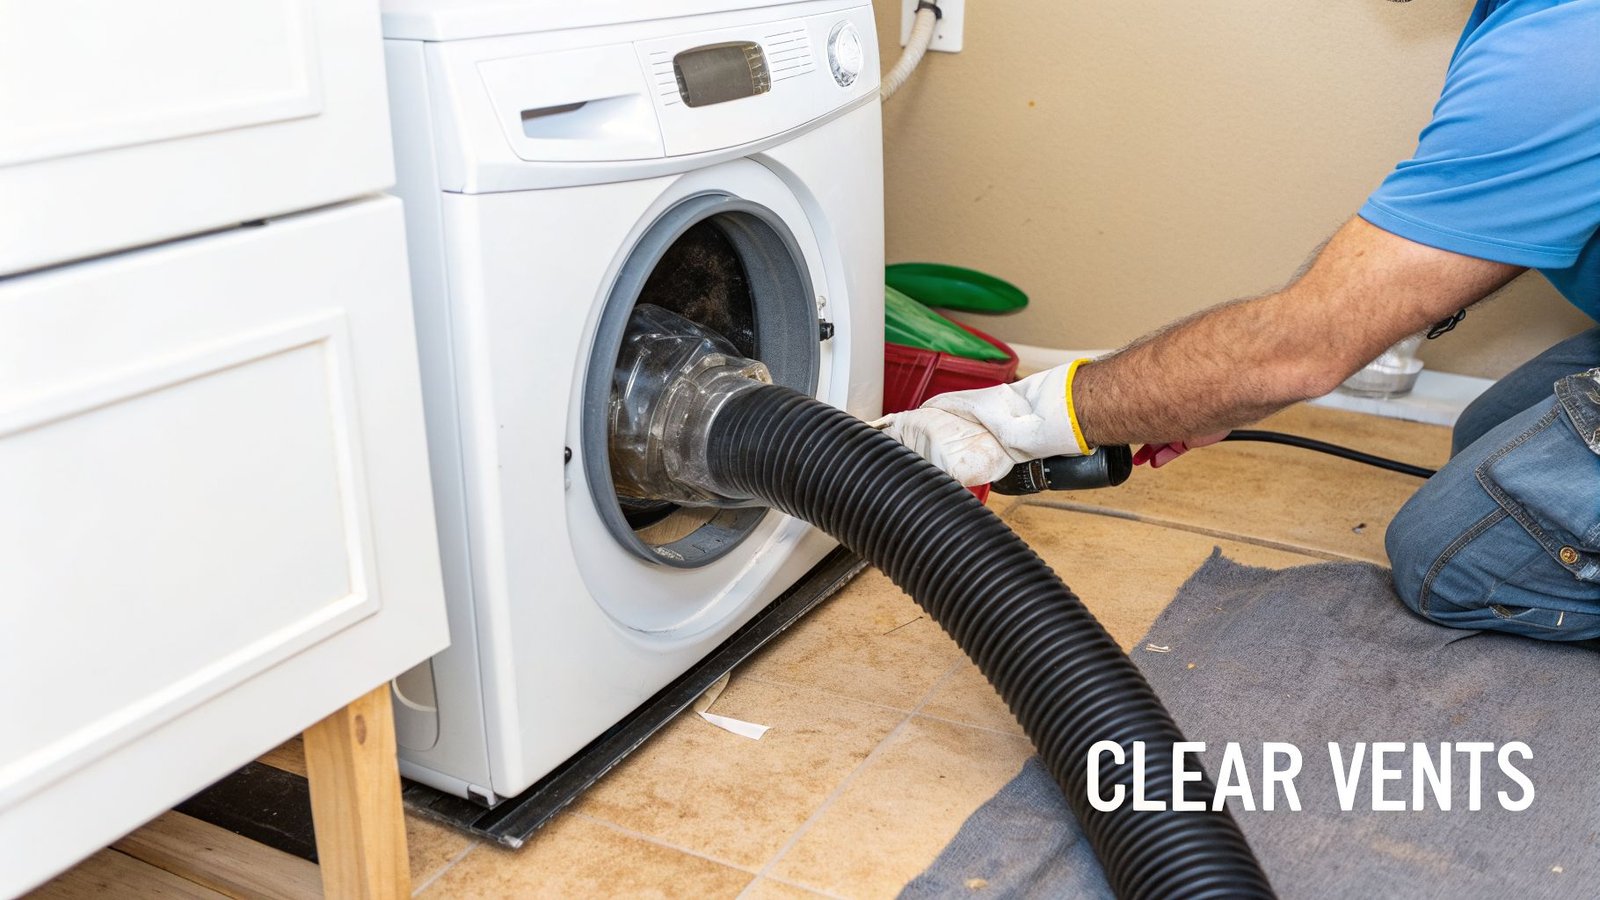
Clearing the Dryer Vent Duct
The most severe obstructions are located here. A prime suspect is the flexible duct that runs from the back of your dryer to the wall, especially the thin, foil-style ones that are easily kinked or crushed.
Carefully pull your dryer away from the wall to get room to work. Detach the vent duct from the back of the dryer and from the wall connection.
- Check for Kinks: Look for any sharp bends or crushed sections. These create choke points where lint builds up.
- Clean It Out: A vacuum is good for the ends, but a dryer vent cleaning kit with a long, flexible brush is the best tool for the job. Clean the entire length of the tube.
- Time for an Upgrade? If you have a foil or plastic accordion-style duct, consider replacing it with a semi-rigid or rigid metal vent. They don’t crush as easily and have a smoother interior that’s much better for airflow.
For a deeper dive into fire prevention, check out our guide on the ultimate dryer maintenance checklist.
Checking the Exterior Vent Cap
The final stop is outside your house. Find the vent cap where the dryer air exits—it’s a common and often-forgotten source of trouble.
You’re looking for a few things:
- Clogged Louvres: The flaps or screen on the cap can get completely caked with lint, sealing the vent shut.
- Nests and Blockages: Birds and small animals sometimes build nests in dryer vents, creating a total blockage.
- Stuck Flap: Make sure the flap can swing open freely. Dirt, debris, or even ice in the winter can cause it to get stuck closed.
Remove any lint, leaves, or nests you come across. A useful tip is to blast out any tenacious debris from the ducting within the wall using an internal leaf blower (with the duct unplugged from the dryer).
Once everything is clear, reconnect the duct securely, turn the gas back on, plug the dryer in, and run a test cycle. Chances are, your problem is solved.
How to Test Faulty Temperature Sensors and Thermostats
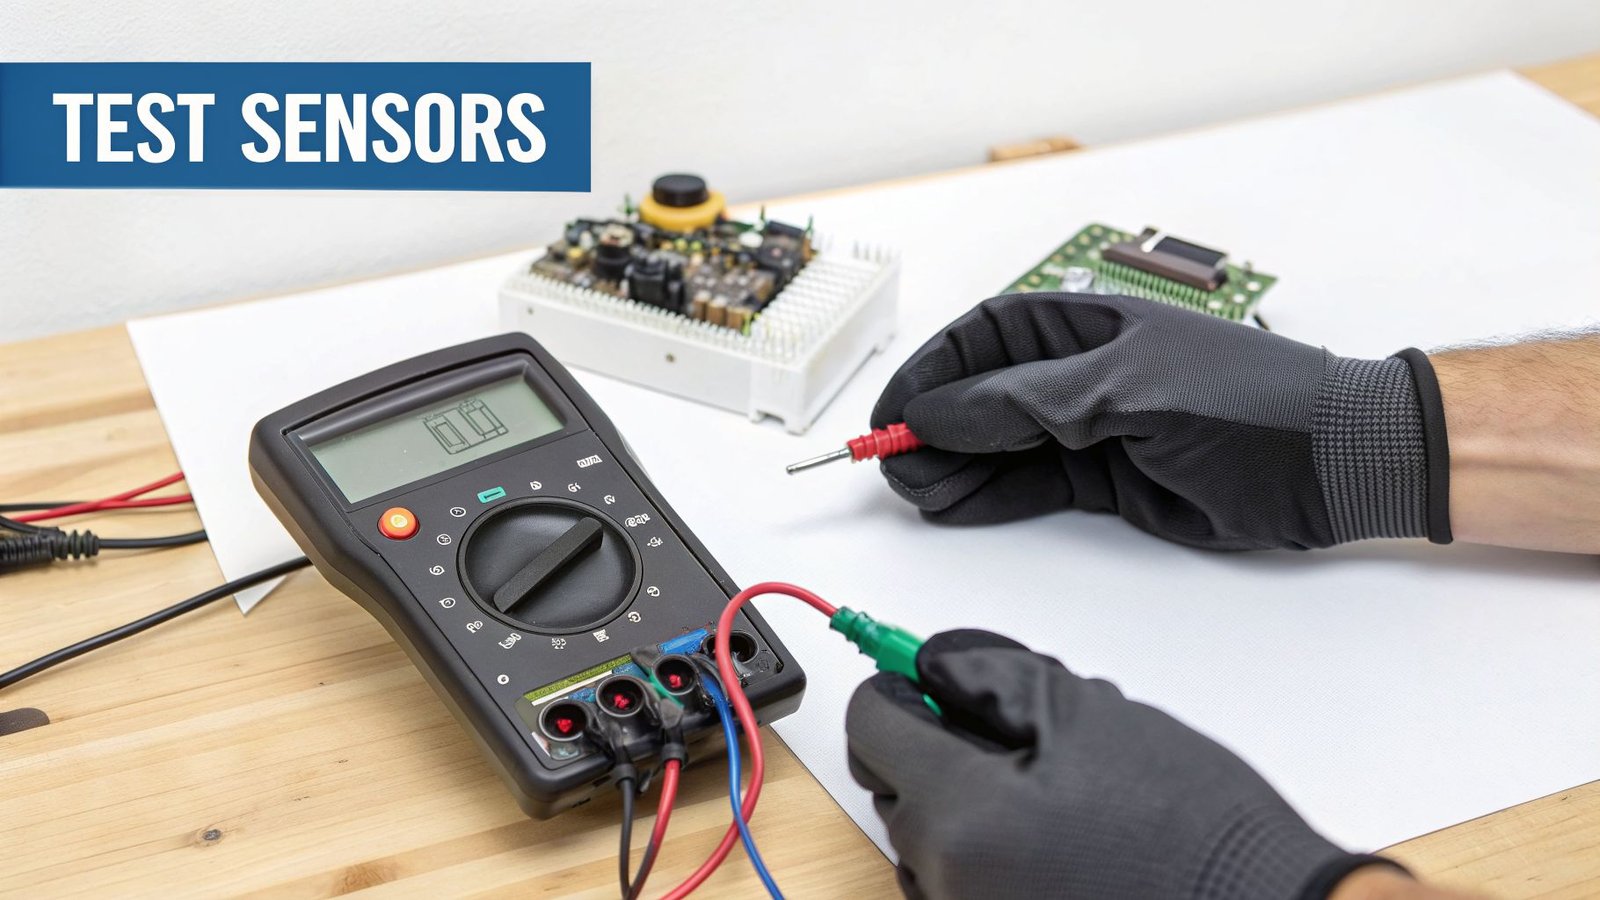
The parts that serve as the dryer’s temperature guards are frequently the cause of problems if you’ve thoroughly cleaned your dryer’s vent system but it still stops working in the middle of a cycle. The dryer may prematurely shut off if one of its many sensors—which are used to control heat—fails, leading the dryer to believe that the garments are dry or that it is overheated.
These sensors work behind the scenes to keep temperatures both safe and effective. When they fail, it’s a classic reason a gas dryer won’t complete its cycle.
Understanding Your Dryer’s Temperature Sensors
Before you can test parts, you need to know who the key players are. While exact names and locations can differ between brands, most gas dryers rely on a similar trio of heat-managing components.
- Cycling Thermostat: This is your main temperature regulator. It cycles the burner on and off to maintain the heat level you selected. If it fails, it might cut the heat off too soon, causing the cycle to stop or tumble with no heat.
- High-Limit Thermostat: This is a safety device, usually mounted on the burner housing. It’s your last line of defence against a fire. If the temperature skyrockets (almost always from a vent clog), this thermostat trips, kills power to the burner, and stops the cycle.
- Thermistor: Most modern dryers use a thermistor, a smarter type of sensor. Its electrical resistance changes with the temperature. The main control board reads these changes to make fine-tuned adjustments, but a faulty one sends bad data, leading to a shutdown.
The good news is that any of these parts can be tested with a simple tool, as long as you put safety first.
Essential Tools and Safety Precautions
A multimeter is the most crucial instrument for this task. It monitors electrical characteristics like resistance and continuity, which are precisely what you need to determine whether a sensor is good or defective.
CRITICAL SAFETY WARNING: Before you remove any panels, you must disconnect the dryer from power by unplugging it. You must also shut off the gas supply at the valve on the line behind the machine. Skipping this step puts you at risk of electrocution or creating a dangerous gas leak.
Additionally, you’ll probably need a Phillips screwdriver or a 1/4-inch nut driver to remove the access panels and a putty knife to snap the top panel clips. To prevent harming cables or connectors, handle components carefully.
Locating and Testing Dryer Thermostats
Most thermostats are small, round components with two wires attached. You’ll typically find them screwed onto the blower housing or the burner tube assembly. The high-limit thermostat is almost always on the burner housing to monitor the heat source directly.
To test a thermostat:
- First, turn off the gas and electricity.
- Next, remove the required panels (typically the bottom front or the back) to gain access to the thermostats.
- Before you disconnect anything, take a snap picture of the wire. Next, carefully remove the two wires from the terminals of the thermostat.
- Select the continuity setting on your multimeter (the one with the sound wave symbol (•)). The probes should beep when you touch them together.
- One probe should be touched to each of the metal terminals on the thermostat. Both the cycle and high-limit thermostats should have continuity at room temperature, indicating that the circuit is closed. Your multimeter should beep or display a zero or very near-zero value.
If your meter reads “OL” (over limit) or doesn’t make a sound, the circuit inside is broken. The part is bad and must be replaced.
Sometimes a faulty sensor is a symptom of another issue. For instance, if your dryer isn’t just stopping but also not heating, our guide on how to fix a dryer that’s not heating can give you a more targeted approach.
How to Test a Thermistor
Testing a thermistor is slightly different because it’s not a simple on/off switch. Here, you’ll be measuring its resistance in ohms (Ω).
- Again, follow all the same safety and access steps.
- Switch your multimeter to the resistance or ohms (Ω) setting. A range of 20k or 50k should work for most models.
- Place one probe on each of the thermistor’s terminals. At room temperature (around 20-25°C), most dryer thermistors should have a resistance reading between 8,000 and 12,000 ohms (8k-12k Ω).
- If you get a reading of “OL” (infinite resistance) or a number close to zero, the thermistor is faulty and needs replacing.
It’s important to find the proper part. You may locate the part number by looking up the model number of your dryer online, or it is typically printed on the side of the old part. Although replacing these sensors is typically an easy do-it-yourself task, calling a professional technician is always the safest course of action if you feel overwhelmed.
Diagnosing Gas Burner and Ignition System Issues
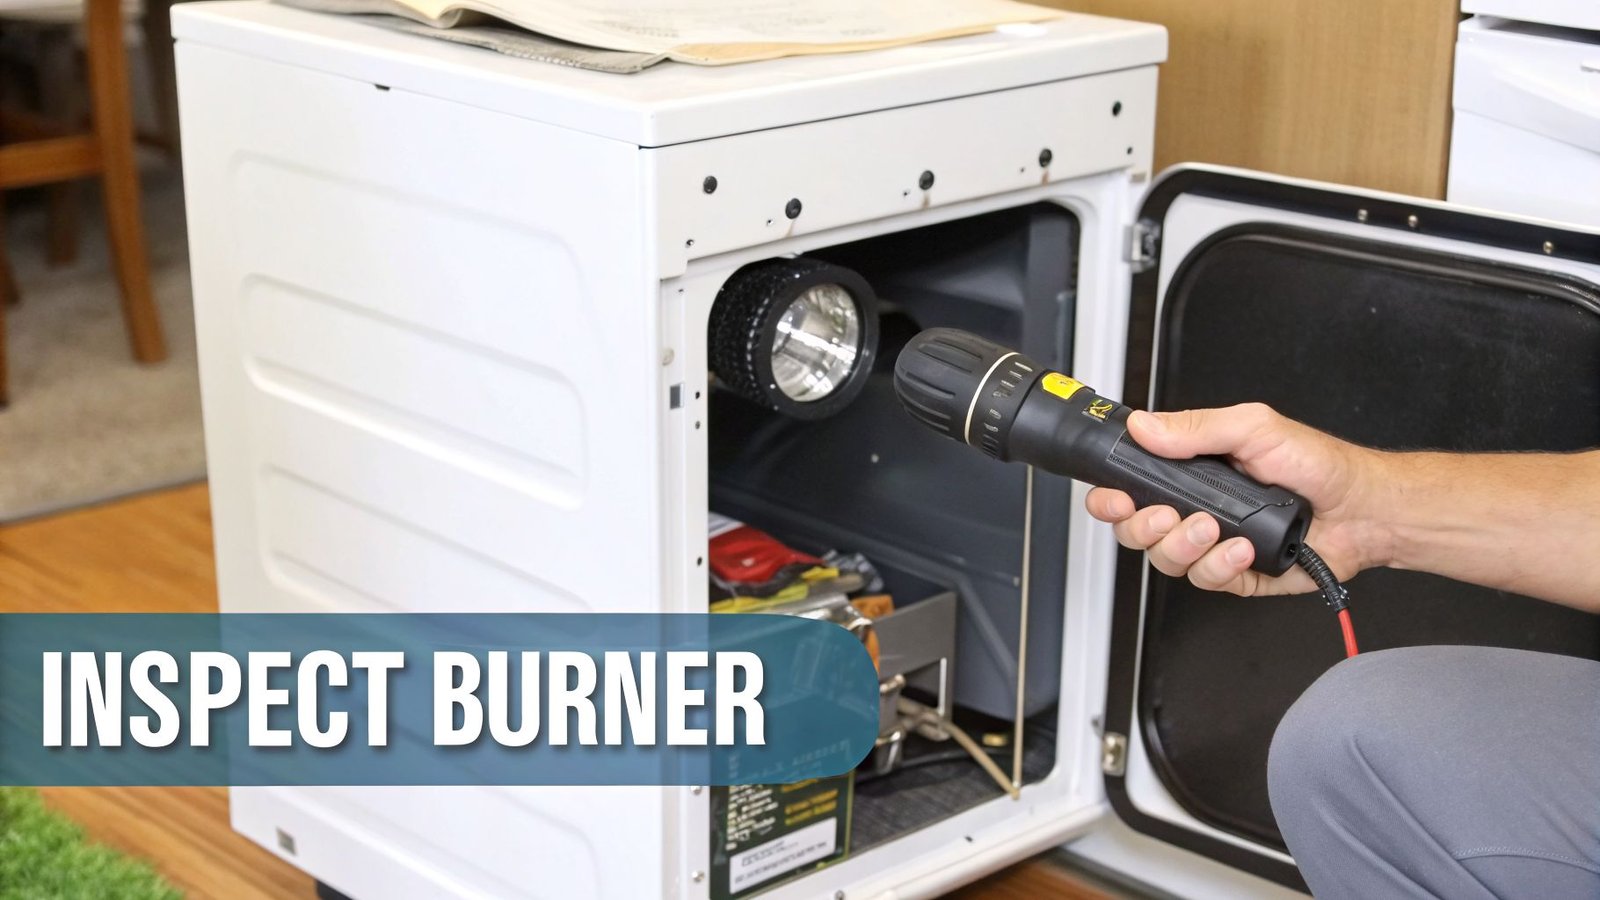
If you’ve checked the vents and the thermostats but the dryer still quits, it’s time to look at the heart of the machine: the gas burner and ignition system.
The flame that warms your dryer is produced by this assembly. The dryer may heat up for a minute before stopping and being unable to relight and complete the task if even one tiny component in this system malfunctions. It’s easier to identify what’s wrong when you know what should happen.
The Normal Ignition Sequence
Let’s walk through the precise sequence your dryer follows to create heat. The whole process is quick, usually taking just 30 to 60 seconds from the moment you press start.
- The Igniter Glows: The glow bar igniter gets power and heats up until it’s glowing bright orange.
- The Flame Sensor Reacts: A small flame sensor next to the igniter detects this intense heat and gives the “all-clear” signal.
- The Gas Valve Opens: The control board sends a signal to the gas valve coils (solenoids), which are tiny electronic gates that open to release gas onto the glowing igniter.
- Ignition Occurs: The gas instantly ignites, creating the flame.
- The Igniter Shuts Off: The flame sensor now detects the flame itself and tells the board to cut power to the igniter, while the gas valve stays open to keep the flame going.
This heating cycle repeats throughout the drying process. A failure at any one of these points will trigger a safety shutdown.
Safety Is Non-Negotiable: This part of your dryer involves both the gas line and high-voltage electrical parts. We’re focused on observational diagnosis—what you can see and hear from a safe distance. Any hands-on testing or replacement of gas system components must be done by a licensed and certified technician.
Listening for Clues
You can figure out a lot just by using your ears. Start a timed dry cycle on high heat and listen closely near the bottom of the machine. Many dryers have a small peephole on the lower front panel where you can watch for the igniter’s glow.
Here’s what you might hear (or not hear):
- You hear a click, but see no glow: If you hear an initial click but the igniter never glows orange, the igniter itself has likely burned out. These are fragile components with a limited life. Learn more in our guide on the common signs of a bad glow bar igniter.
- The igniter glows, but there’s no flame: This is a key clue. The igniter glows for 30 to 60 seconds, you hear a second click as it turns off, but there’s no “whoosh” sound of ignition. This classic symptom points straight to weak or failed gas valve coils.
- The flame ignites, but shuts off after a few seconds: This is a flame sensor problem. The sensor fails to properly detect the flame it’s sitting in. As a safety precaution, it tells the control board the ignition failed, and the system immediately shuts off the gas.
If you’ve checked for airflow blockages, tested the sensors, and confirmed the burner is working, but your dryer still won’t finish a cycle, it’s time to look at the brains of the operation. The problem could be a faulty mechanical timer or a failing electronic control board.
When the logic center of your appliance fails, the symptoms can be baffling. It’s not as clear-cut as a clogged vent. A bad control board or timer might make the dryer stop at random intervals, get stuck on a setting, or act erratically.
Distinguishing a Timer Issue from a Control Board Fault
Figuring out which of these two is the culprit usually comes down to the model of your dryer and the specific way it’s failing.
Does your dryer have a classic, chunky dial that you turn to set the time? That’s a mechanical timer. They work like a clock, using physical contacts to run the cycle.
- A tell-tale sign of a bad timer is the dryer stopping at the exact same spot in a timed cycle, every single time.
- The timer knob might also feel wobbly, refuse to “click” into place, or you might notice it isn’t moving while the dryer runs.
If your dryer has a digital screen and push-button controls, it’s governed by an electronic control board (ECB). This is the dryer’s central computer.
- Symptoms of a failing control board are typically more widespread and inconsistent. You might see the panel lights flicker, buttons become unresponsive, or random error codes pop up.
- The dryer might shut off at unpredictable times on any setting, whether it’s a timed dry or an automatic sensor cycle.
Expert Insight: An overheating drive motor can sometimes fool you into thinking it’s a control board problem. Most dryer motors have an internal thermal overload switch. If the motor gets too hot, it will trip and shut the dryer down. After it cools, it often resets, making the problem seem intermittent, just like a faulty board.
Safe Homeowner Checks You Can Perform
Although a professional should replace a timer or control board, there are a few safe diagnostic actions you may do first.
The simplest method is a “hard reset.” Software bugs can occasionally occur in dryers with electronic controls. For a minimum of five to ten minutes, unplug the dryer from the wall. This allows the board’s capacitors to completely discharge, which can eliminate transient faults. Try running a cycle after plugging it back in.
Another option is to conduct a brief visual examination. After unplugging the dryer, proceed to the control panel area. Examine the board for any overt indications of failure, such as scorch marks, burned areas, or protruding capacitors.
Visible damage is a clear sign that the board has failed and needs professional attention. You can learn more about what that involves in our guide to appliance control board repair.
If a hard reset doesn’t solve the problem and you can’t see any other obvious cause, a faulty timer or control board is a strong suspect. Noting these specific details will help a technician pinpoint the problem much faster.
Knowing When to Call a Professional Dryer Technician
Even though doing a dryer repair yourself might be satisfying, there are situations in which hiring a professional is crucial for your safety. Knowing your boundaries, particularly with a gas appliance, is a sign of experience rather than failure.
The stench of gas is the biggest warning sign. Stop everything at away if you detect even the slightest hint of sulfur or rotten eggs. Avoid touching any electrical switches or lights. Get out of the house and phone a licensed technician and your gas company from a safe distance.
Red Flags That Mean It’s Time to Stop
Beyond the smell of gas, other situations are clear signs that a repair has moved beyond a simple DIY fix. It’s time to call in an expert if the job involves any of the following:
- Complex Electrical Work: Diagnosing a faulty control board or tracing a short circuit through a maze of wires is another level entirely. One wrong move with live electrical components is incredibly dangerous.
- Touching Gas System Components: Any repair that involves the gas valve, gas supply line, or the burner assembly is strictly for a licensed gas technician. A small mistake can lead to a dangerous gas leak or carbon monoxide poisoning.
- Major Disassembly: If the repair requires you to start taking out the drum or pulling the motor, you’re deep into territory where things can easily go wrong.
Key Takeaway: Your safety is the line between a DIY fix and a professional job. If you feel uncomfortable or the repair touches the gas supply or complex electronics, calling an expert is always the right decision.
If you’ve run into a wall with your gas dryer repair, don’t guess. Our certified technicians are on standby to take over and get it fixed safely.
A Few Common Scenarios We See in the Field
Here are a few specific behaviours we get calls about, along with the likely culprits.
My Dryer Stops but Restarts a Few Minutes Later. What Gives?
This is the traditional indication that a component is overheating. Most of the time, it’s either the motor’s thermal overload switch or the high-limit thermostat.
The dryer starts up again after the part cools and resets, repeating the cycle. Heat-trapping clogged vent lines are nearly always the source of the issue. What’s required is a thorough cleaning.
Why Does My Dryer Only Stop on the Automatic Setting?
If your dryer runs perfectly on a timed cycle but gives up early on the automatic setting, the problem is almost certainly your moisture sensor. These are two little metal strips inside the drum that are supposed to detect when your clothes are dry.
Over time, these sensors get covered with an invisible film from dryer sheets and fabric softener. This film tricks the dryer into thinking the clothes are dry when they aren’t, causing it to shut off prematurely. The fix is usually simple: just wipe the metal strips clean with a cloth and a bit of rubbing alcohol.
Could a Bad Door Switch Be the Problem?
It’s possible, though not as common as a vent or sensor issue. A worn-out door switch can become loose, and the constant vibration from the drum can cause it to lose connection for just a split second.
That momentary interruption is enough to make the dryer think you’ve opened the door, so it safely stops the cycle. If your dryer stops and you notice the drum light pops on, or if you can get it to restart by jiggling the door, a faulty door switch is the prime suspect.
If you’ve worked through these common issues and your gas dryer still won’t finish its cycle, it’s time to call in a professional. The expert technicians at Advance Appliance Ltd are ready to help with same-day service across Edmonton, Calgary, and Red Deer. We’ll safely get to the bottom of it and get your dryer running properly again. Book your repair online or give us a call today.